How To Bridge Your Assets To Arbitrum

Why Gas Fees Matter in Blockchain Transactions

Gas fees are the lifeblood of blockchain transactions, enabling the computational fuel that drives the process. Fees represent the cost of a transaction and are paid to the miners who facilitate it. Without gas fees, users become the product, as is the case with Web2 applications that rely on implicit data collection. In contrast, Web3 empowers users by introducing gas fees as a means of achieving greater online autonomy. While essential to crypto networks, high gas fees pose a significant barrier to adoption, prompting the development of L2 networks like Arbitrum.

How to connect your MetaMask wallet to Arbirtrum
Arbitrum is a pioneering Layer 2 (L2) solution for Ethereum, boasting over 3 million processed transactions and approximately 2.5B locked assets. By relying on Ethereum’s Layer 1 (L1) security, Arbitrum ensures secure transactions while offering lower gas fees. The use of optimistic rollups is the key factor in reducing gas fees on Arbitrum. Optimistic rollups bundle transactions into smart contracts, using less computation and thereby minimizing gas fees for faster and more cost-effective transactions.

To give Arbitrum a try, start by adding the network to your MetaMask wallet in three simple steps.

1. Open MetaMask and click on “Ethereum Mainnet” at the top.
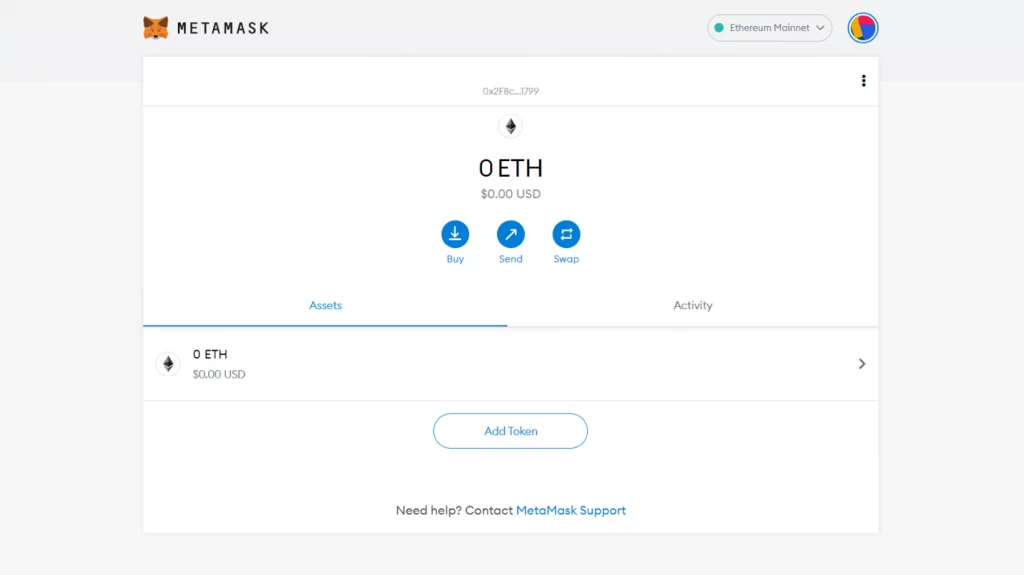
Then, select “Custom RPC.”
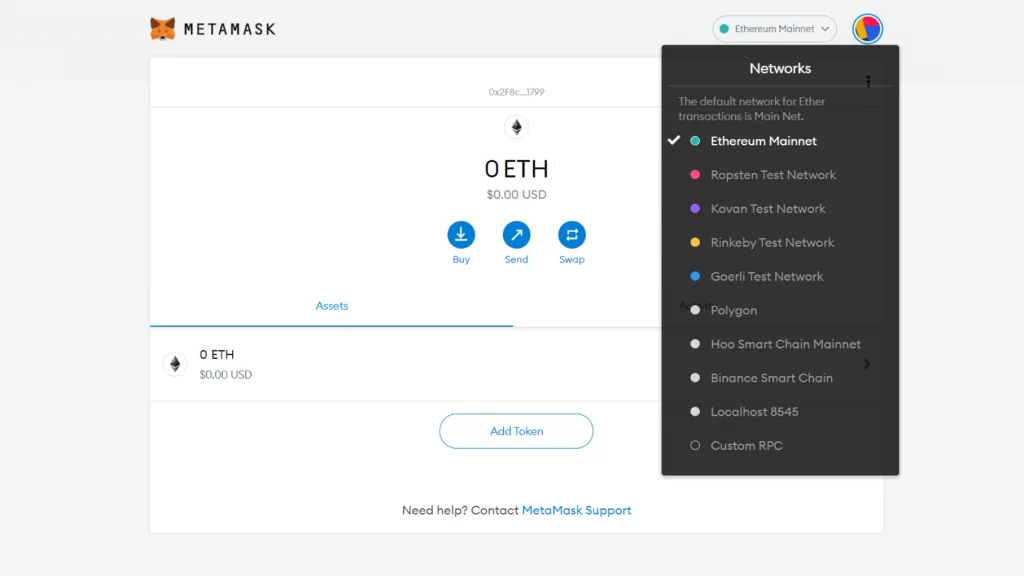
Great job! You have successfully linked your MetaMask wallet to the Arbitrum network and unlocked new possibilities such as bridging your ETH and exploring exciting new dapps.

Bridging Your Assets from Ethereum to Arbitrum 

To transfer your ETH from Layer 1 Ethereum to Layer 2 Arbitrum, follow these simple steps:

  1. Navigate to https://bridge.arbitrum.io/.
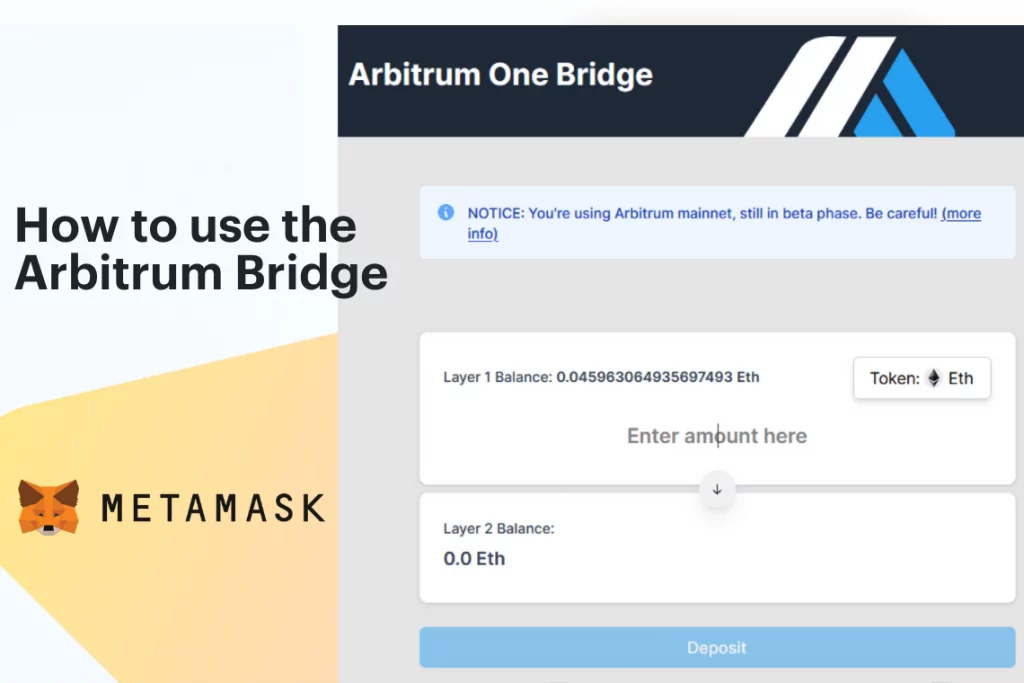
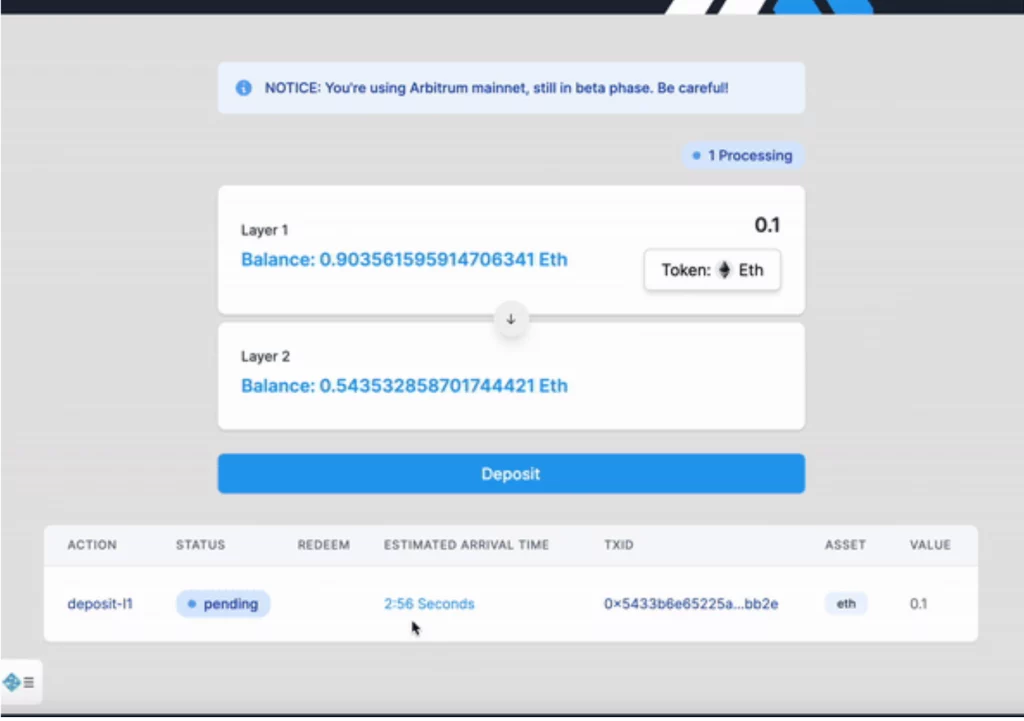
  2. As your MetaMask wallet is already connected, the screen will display the option to make a deposit, as shown below:
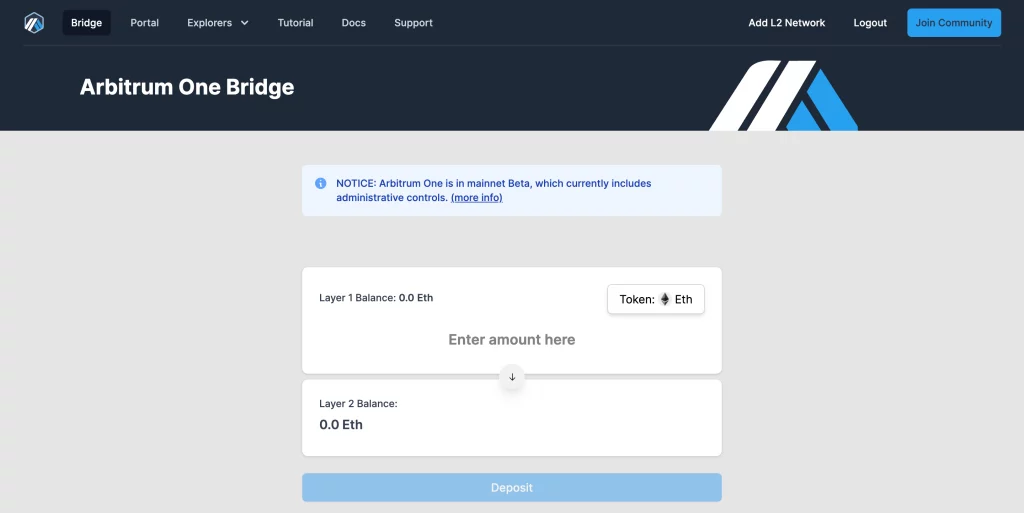
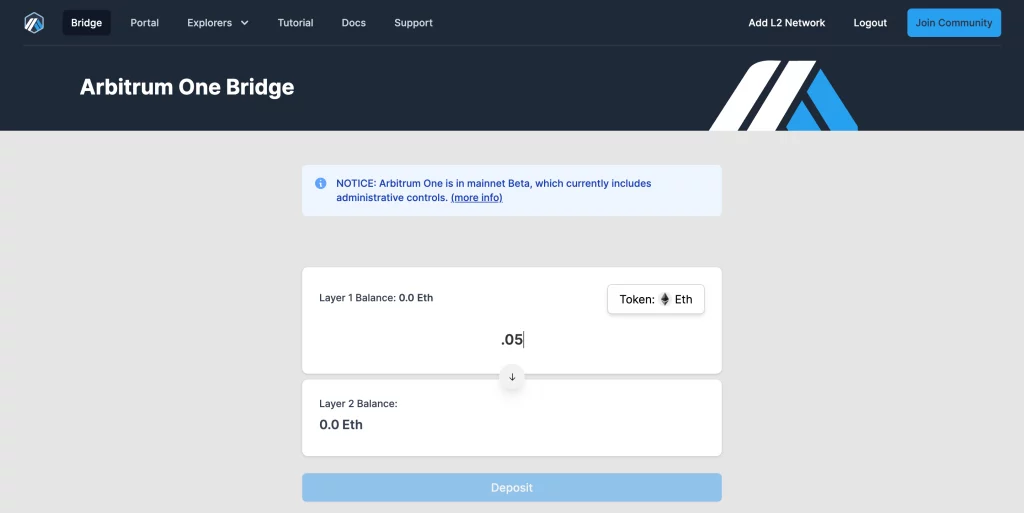
After accessing the https://bridge.arbitrum.io/ website, input the desired amount of ETH you wish to transfer to Arbitrum, and then click on the “Deposit” button to complete the transaction.
To complete the transaction, you must confirm it in your wallet. It’s important to note that this transaction is on Layer 1, and standard gas fees will be applied. However, once the ETH has been transferred to Arbitrum, you can take advantage of lower gas fees. Double-check the transaction amount, and if everything looks good, click on the “Confirm” button.
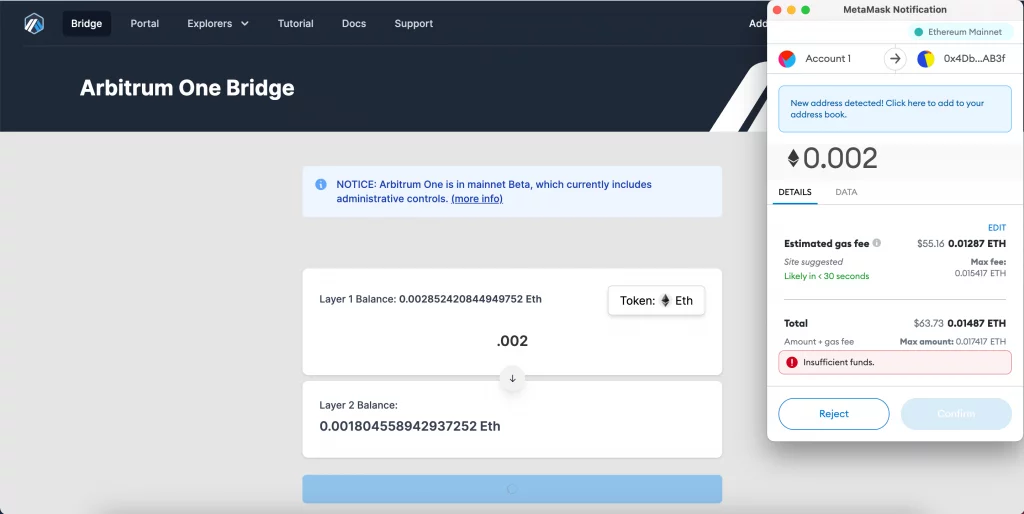
Once you have confirmed the transaction, it will be displayed at the bottom of your screen and will begin to process. This process may take several minutes to complete.
If you need further assistance with bridging your assets, you can refer to Arbitrum’s tutorial available on their website.

After successfully transferring ETH to Arbitrum, you can begin to use it on various dapps available on the Arbitrum One Portal.

Let’s now take a look at some of the many dapps that are available to you on Arbitrum.

Exploring the Wide Range of Dapps Available on Arbitrum

The Arbitrum One Portal serves as the main gateway to the Arbitrum ecosystem, offering access to over 50 of the most widely used dapps on the Web3 network. From decentralized exchanges and gaming platforms to prediction markets and lending protocols, the portal provides users with an array of options to explore and engage with. With the added benefit of low gas fees and fast transaction speeds, these dapps can be utilized in a cost-effective and efficient manner.
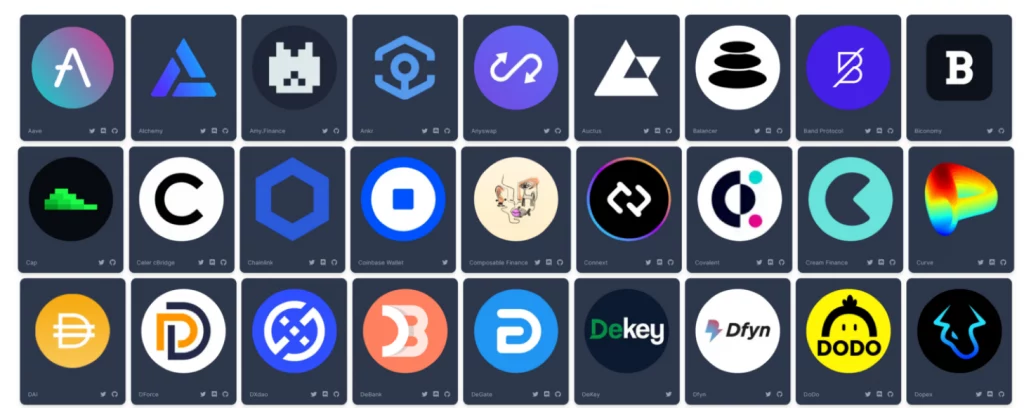
Take a closer look at what Arbitrum has to offer now that you are all set up with your MetaMask. You’ll find that many popular dapps on the mainnet such as Uniswap, Balancer, and Curve are also available on Arbitrum, as well as many others.

The real reason to bridge to Arbitrum

While there are plenty of reasons to bridge your assets to Arbitrum, one that stands out is the amazing gaming experience on TreasureDAO. Knights of the Ether, in particular, is a game worth checking out. Our review of Knights of the Ether can be seen here. So, if you’re looking for a new and exciting way to use your ETH on Arbitrum, be sure to give Knights of the Ether and the other games in the TreasureDAO ecosystem a try.

Stay tuned to TAGDesk for our upcoming in depth look at the TreasureDAO ecosystem.
SPLINTERFORGE EARLY GAMEPLAY GUIDE

Enter The Forge and Get Started Continuing from our previous tutorials on creating a Hive account…

How to Create a Binance Account

At TAGDesk, we don’t endorse any particular centralized or decentralized exchange. We strongly recommend that you hold your cryptocurrencies in your own wallet. However, there may be occasions when you need to use an exchange, such as exchanging currencies for gaming or converting tournament rewards to fiat currency. Keeping this in mind, here’s a step-by-step guide on how to register on Binance:

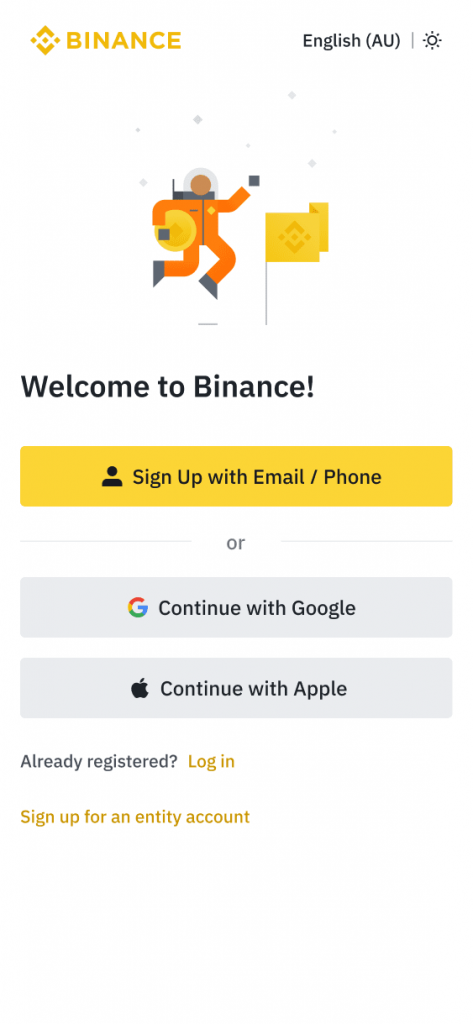
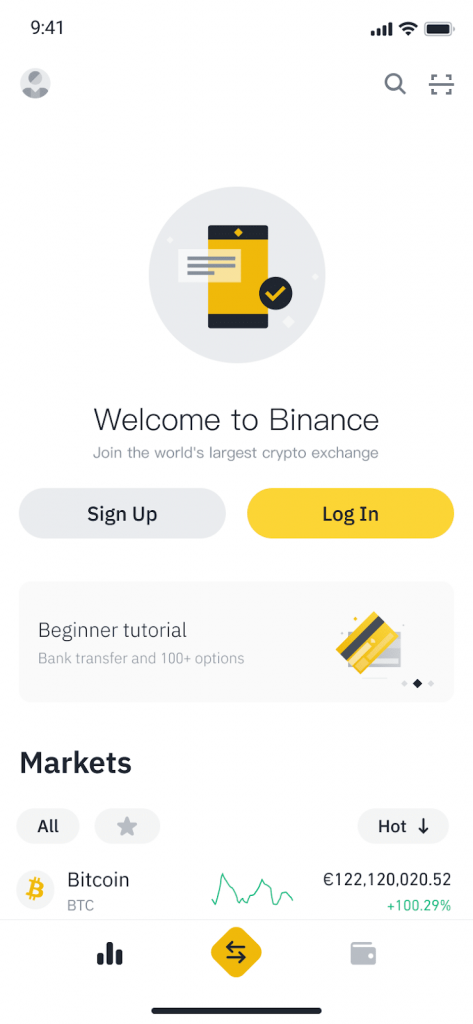
1. To begin the registration process on Binance, open the Binance app and tap on the “Sign Up” button.

2. After tapping on “Sign Up”, you will be prompted to select a registration method. Binance offers several options, including signing up with your email address, phone number, or using your Apple or Google account. Choose the registration method that you prefer.

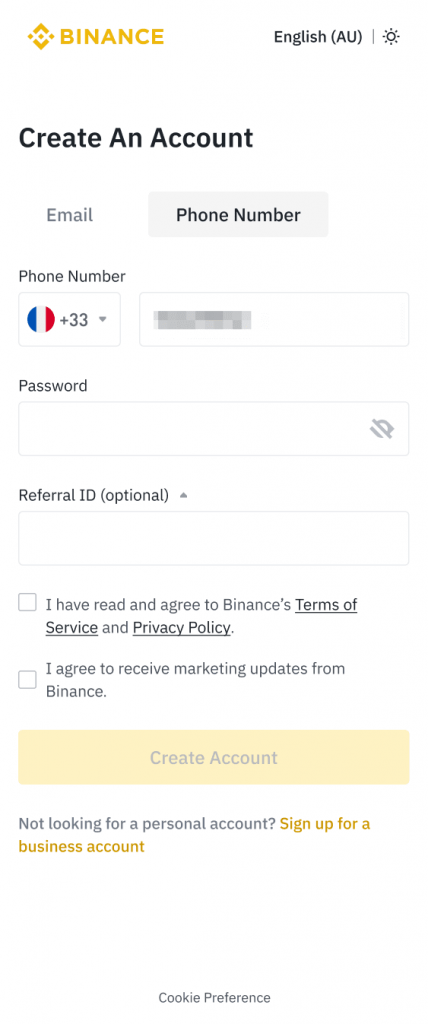
3. Next, select either “Email” or “Phone Number” as your preferred method of registration. Enter your email address or phone number and create a strong password for your account. Keep in mind that your password should be at least 8 characters long and include one uppercase letter and one number.

If you were referred to Binance by a friend, you can enter their Referral ID (optional) during the registration process.

Read and agree to Binance’s Terms of Service and Privacy Policy, and then tap on “Create Account”.

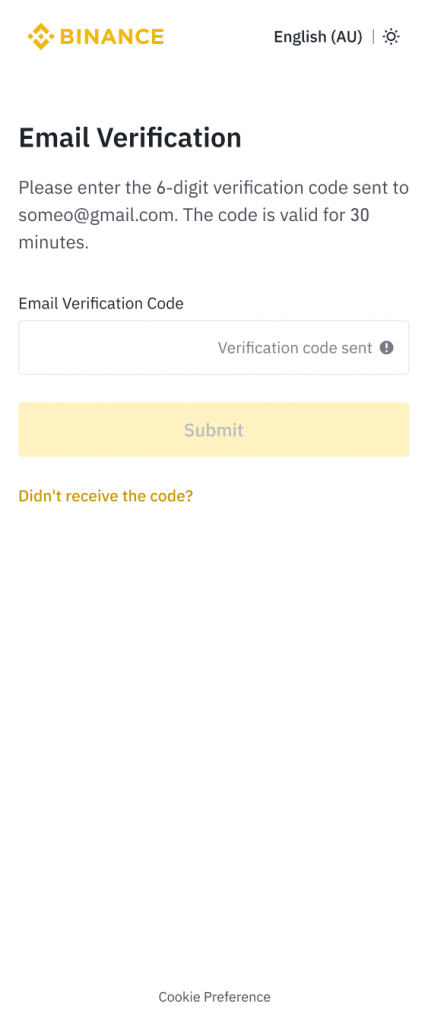
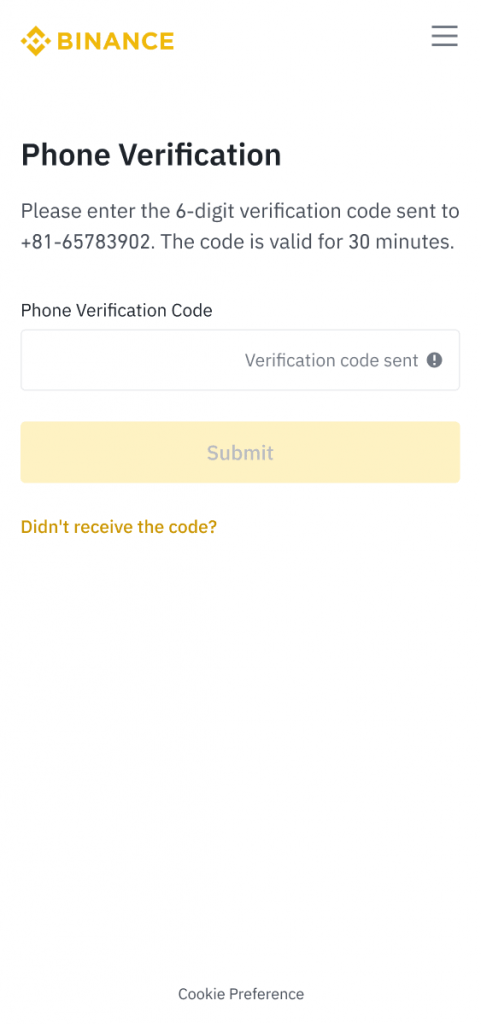
4. After creating your account on Binance, you will receive a 6-digit verification code via email or phone, depending on the registration method you chose. Enter the code within 30 minutes and tap on “Submit”.

5. Congratulations! You have now successfully registered and created your Binance account.

After creating an account on Binance, users may still need to go through a KYC (Know Your Customer) process to fully utilize the platform’s features. KYC is a standard process used by financial institutions and regulated cryptocurrency exchanges to verify the identity of their users. The purpose of this process is to prevent fraud, money laundering, and other illegal activities. KYC may involve submitting personal information, such as a government-issued ID or passport, and sometimes even a selfie for facial recognition. Once you’ve completed the KYC process on Binance, you’ll be able to deposit, withdraw, and trade larger amounts of cryptocurrencies.

How to create an NFTy Arcade account

To access the NFTy Arcade Gateway, follow these steps:

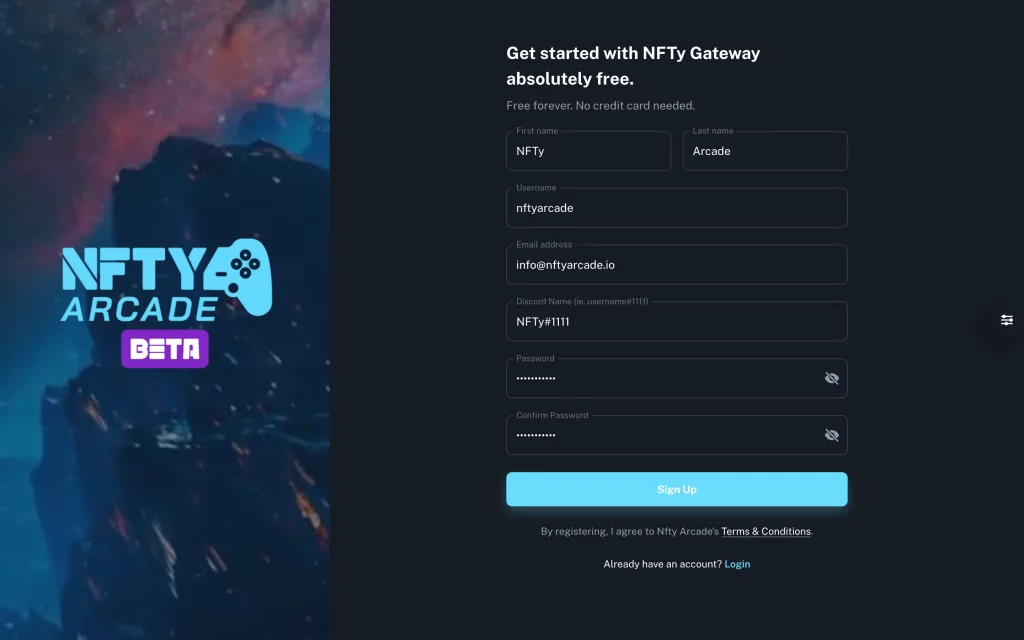
  1. Go to the Gateway.
  2. Click on the “Get started” button.
  3. Fill out all the required fields with your information. If you’re logging in from your phone, you’ll need to access the site through the keychain app.

Please ensure that your password is at least 8 characters long and includes at least one lowercase letter (a-z), one uppercase letter (A-Z), one number (0-9), and one special character (e.g. !@#$%^&).

Linking a Splinterlands Account

Prior to starting, you need to set up a Splinterlands account. Read how to do so here.

Setup

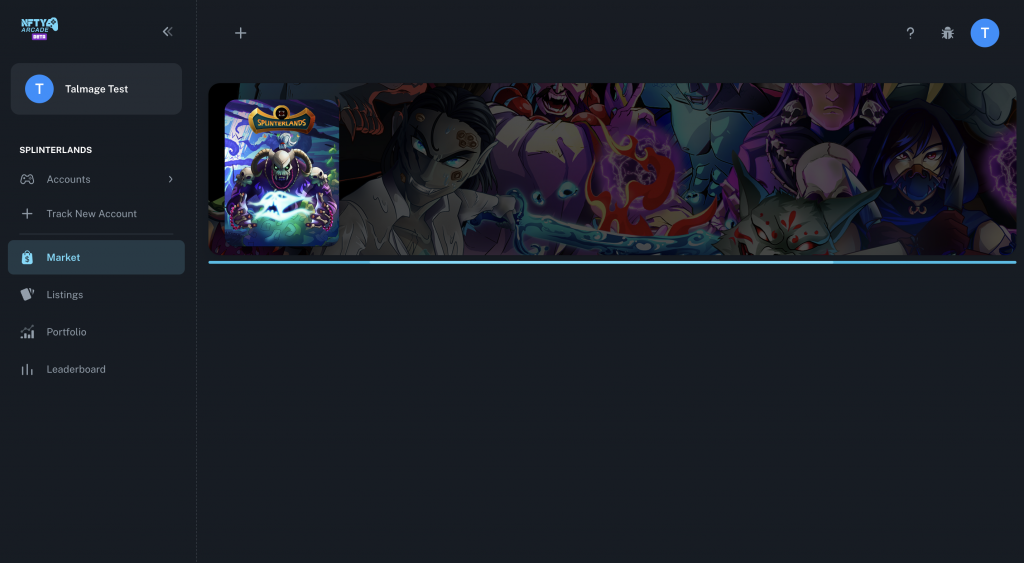
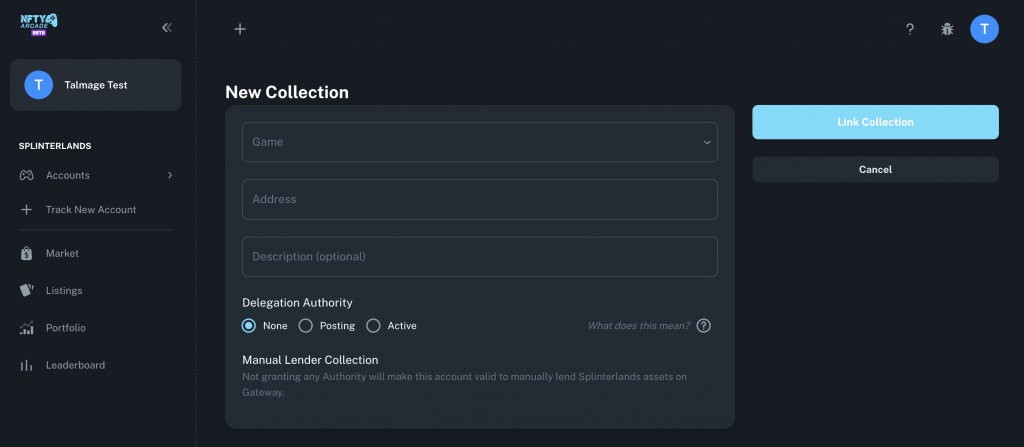
Step 1: Starting Setup To begin the setup process, select the “+” icon located at the top of the page and add Splinterlands as your preferred game.

  1. On the left-hand navigation bar, click the + Track New Account button.

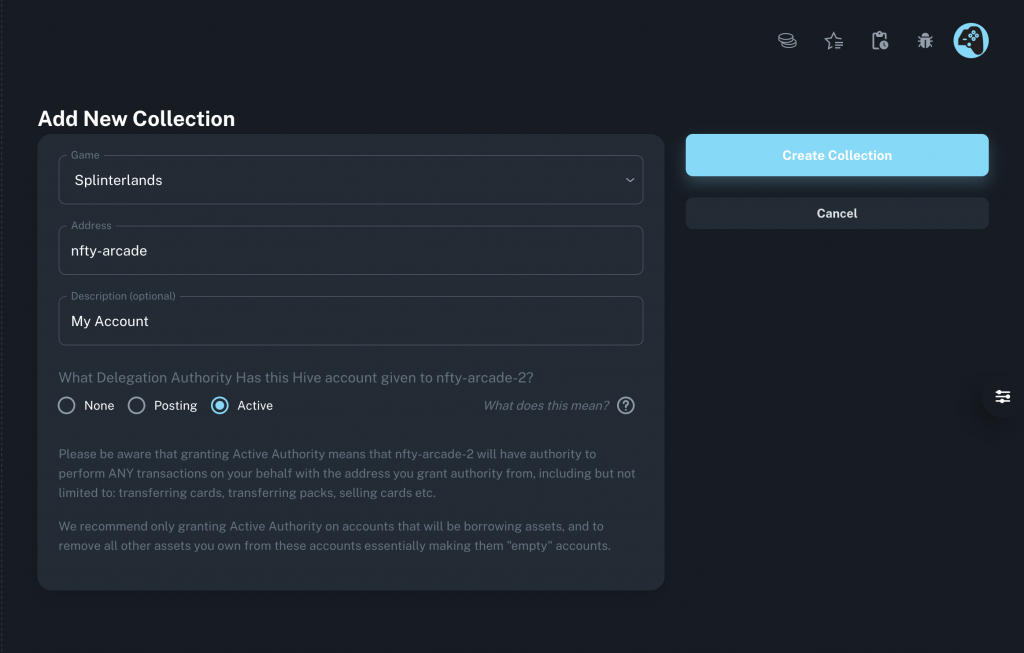
2. Select Splinterlands as the game to connect to Gateway.

3. Enter your Hive username in the Address field. Your Hive address and Splinterlands username are the same.

4. Select a delegation authority to grant Gateway:

  • Posting Authority allows Gateway to automatically delegate and undelegate Splinterlands cards for you. Select this authority if you will use this account to lend or buy decks.
  • Active Authority allows Gateway to automatically make payments for Splinterlands Listings you are borrowing. Select this authority if you will use this account to borrow decks.

WARNING: When you borrow on the platform, lenders will have access to all the claimable SPS in your account. Note that claimable SPS is distinct from staked SPS – once staked, NFTy Arcade does not have access to it.

To ensure a smooth borrowing experience, it is strongly advised that you claim all outstanding SPS before initiating the borrowing period. Any SPS that you claim during the borrowing period will be subject to the percentage split that you have agreed upon with the lender.

Completing setup

Step 2:

If desired, provide a brief description to help you identify each account.

Then, click on the “Create Collection” button to finalize the setup process.

Next, you will need to approve the keychain transaction to verify that you have the account you want to add in your keychain.

After approving the transaction, click the “Create Collection” button again.

Wait for up to a minute for the system to process your request. If all information was entered correctly, you will be directed to the “My Collections” page.

Borrowing A Deck

Before You Begin

Grant Gateway Active Authority for the account you want to play on.

Renting Step 1

Step 1: Find a Listing to Rent

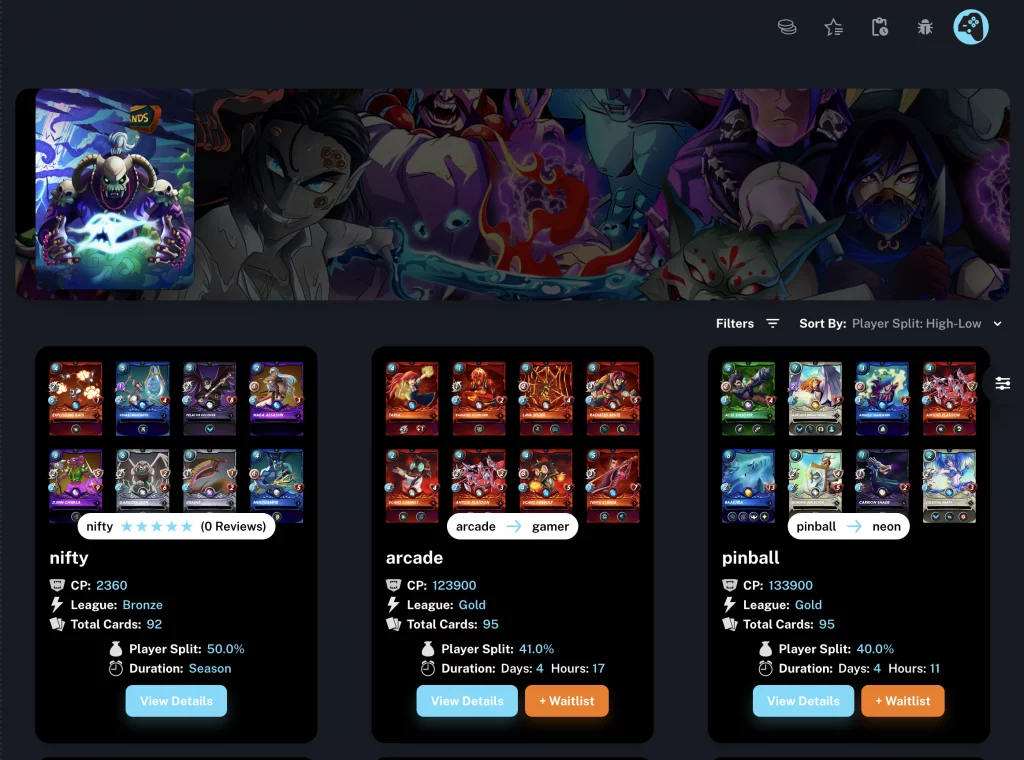
  1. Navigate to the Market tab.
  2. Optionally, use the Filters to refine your search by availability, league, and collection power.
  3. Select an option to Sort By to arrange the listings by player split, duration, and collection power.
  4. Click on View Details to see more information about an available listing you want to rent.
  5. If the listing is currently unavailable, click on the Waitlist button to be notified when it becomes available.

Renting Step 2

Step 2: Review the Listing Terms After selecting the Market tab and optionally adjusting Filters and Sort By options, you can view the details of an available listing by clicking on “View Details”. If the listing is currently unavailable, you can join the waitlist.

Before renting a listing, review the listing description to understand the terms. You will see the Default League, which indicates the league that the borrower is expected to compete in, as well as the Minimum Rating, which is the minimum required Collection Power to rent the listing.

The Lender Split is the percentage of total daily earnings that you will receive as the lender. You should also check the Duration of the rental, which can be set to Season, Indefinite, or a specific period. If the rental is set to Season, the end time of the rental contract will be a few hours after the end of the current season, allowing you to earn your Lender Split percentage of season chests in addition to daily earnings.

If the rental is set to Indefinite, there is no end time for the rental contract, and you will need to manually cancel the rental period on the Listings tab. The Set Period option specifies the number of days you can play using the collection.

Renting Step 3

Step 3: Request the Rental
From the listing details page, select a collection to receive the rental from the Collection menu.
Click the Request button to request the rental.
A keychain transaction will appear, asking you to delegate rewards. This means that the lender’s portion of the Lender Split will be automatically sent to them each time you claim Splinterlands rewards.
Wait for the lender to approve the request. The lender has 24 hours to respond. If they do not approve the transaction within this time, you will be prompted to cancel the reward delegation.

More than just Splinterlands!

Soulbound cards are a special type of card that can only be earned by playing Splinterlands. These cards are unique in that they cannot be traded or sold on the open market, but they do have an important use in the Splinterlands ecosystem. If you earn a soulbound card while renting a collection on NFTy Arcade, you can use it to earn money in Splinterforge. By renting collections on NFTy Arcade and earning soulbound cards, you not only get to experience different play styles and strategies, but also have the opportunity to earn additional income through the Splinterlands economy.

How to create an ENJIN wallet

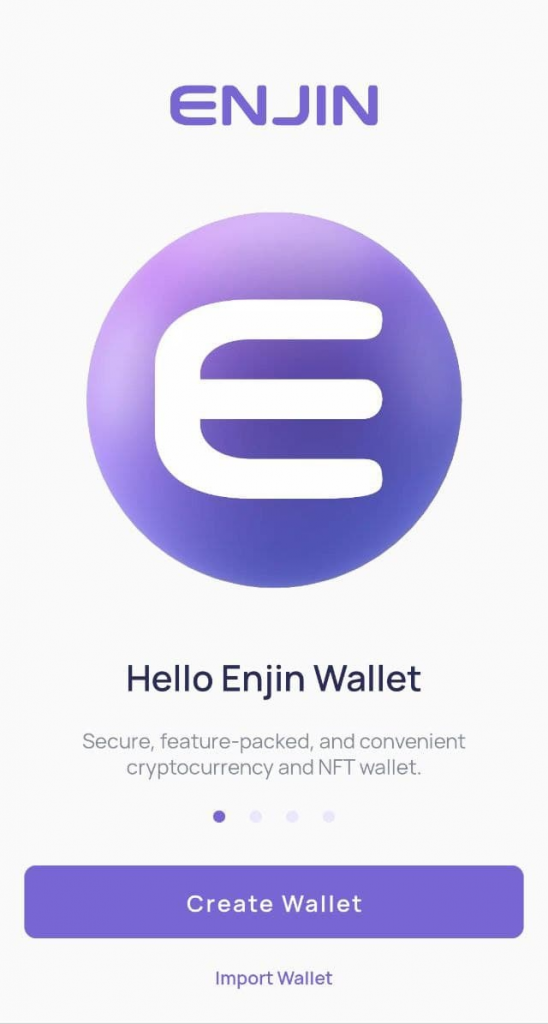
Once you have installed the Enjin Wallet 2.0 app, you will see two options on the Enjin Wallet screen: “Create Wallet” and “Import Wallet”. Click the “Create Wallet” button to begin the process.

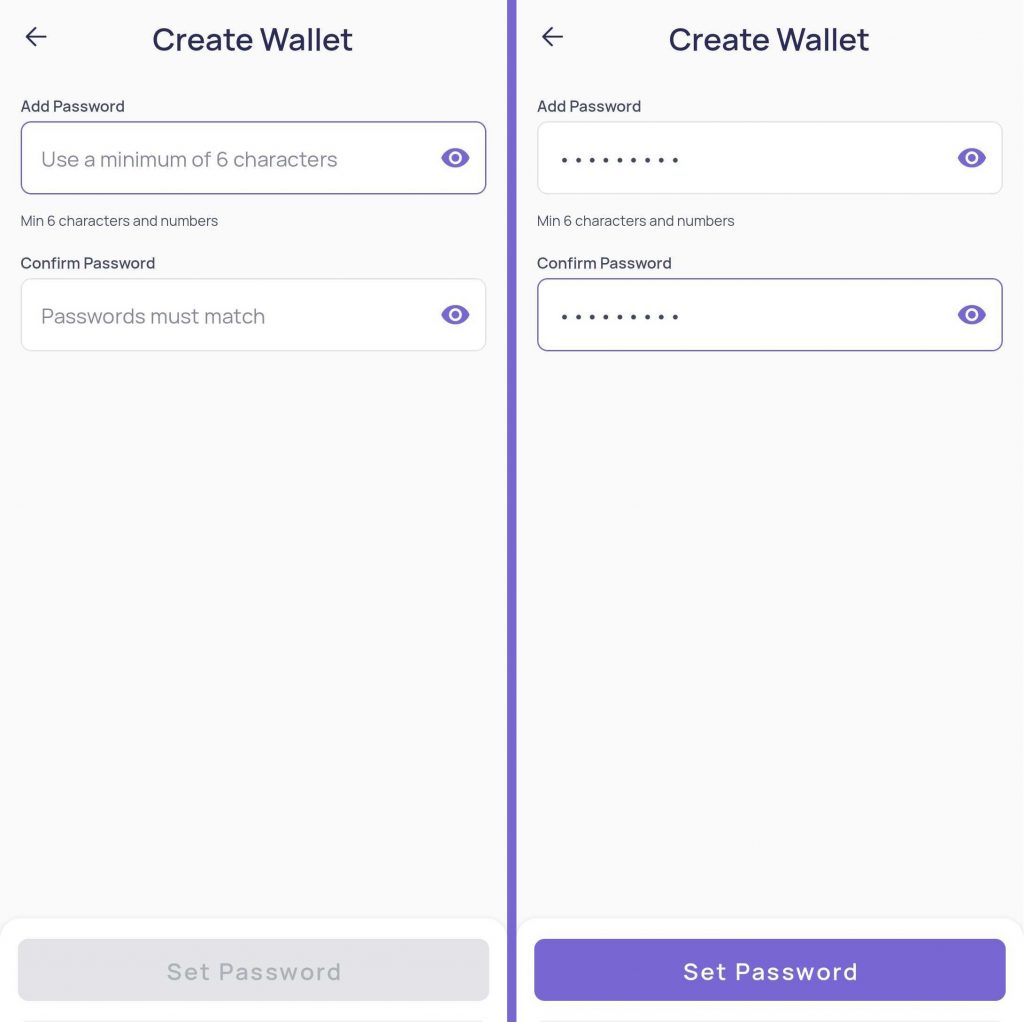
Once you choose to create your Enjin Wallet, the app will prompt you to enter a password of at least 6 characters, which can include letters, special characters, and numbers. Your password is crucial for your wallet’s security and serves as the second most important piece of information, next to your 12-word recovery phrase. Without your password, you won’t be able to back up your wallet in case you lose your recovery phrase while importing the wallet into your smartphone.

Once you have entered and confirmed your password, click on the “Set Password” button to move to the next screen, which is the “Back up your Wallet” screen.

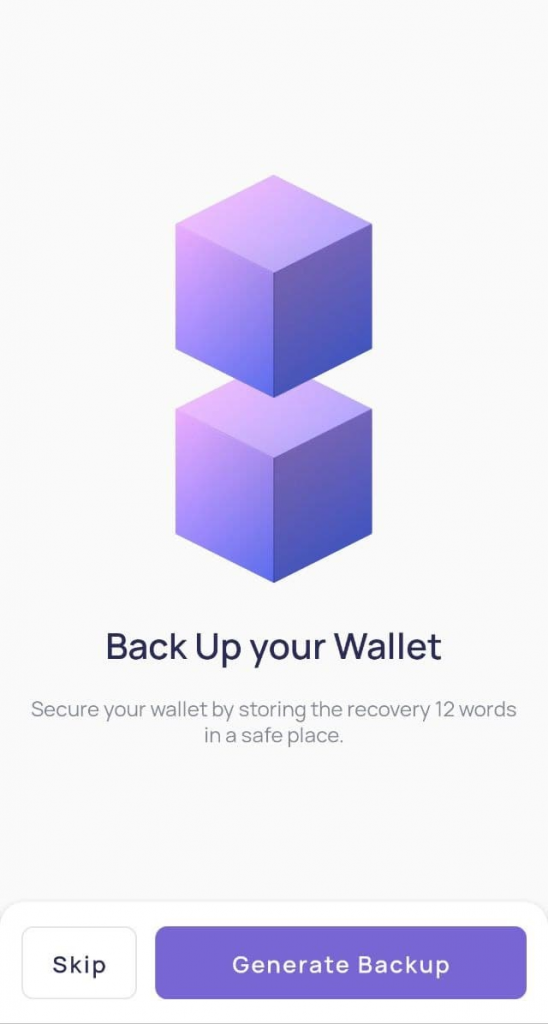
When you reach the “Back up your Wallet” screen, you will be presented with two options: “Skip” and “Generate Backup”. If you are an experienced user and can backup your wallet before adding funds, you can choose to skip the backup for now.

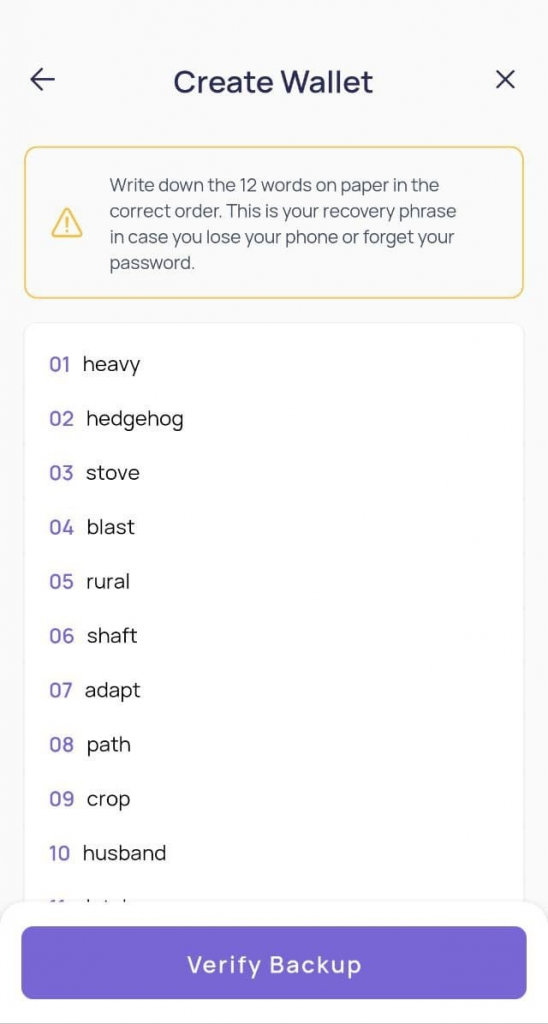
However, we strongly recommend that you tap the “Generate Backup” button, which will guide you through the process of writing down your 12-word Recovery Phrase on paper in the exact same order. It’s essential to avoid saving your backup anywhere online or in your phone as it may pose a risk to the security of your wallet.

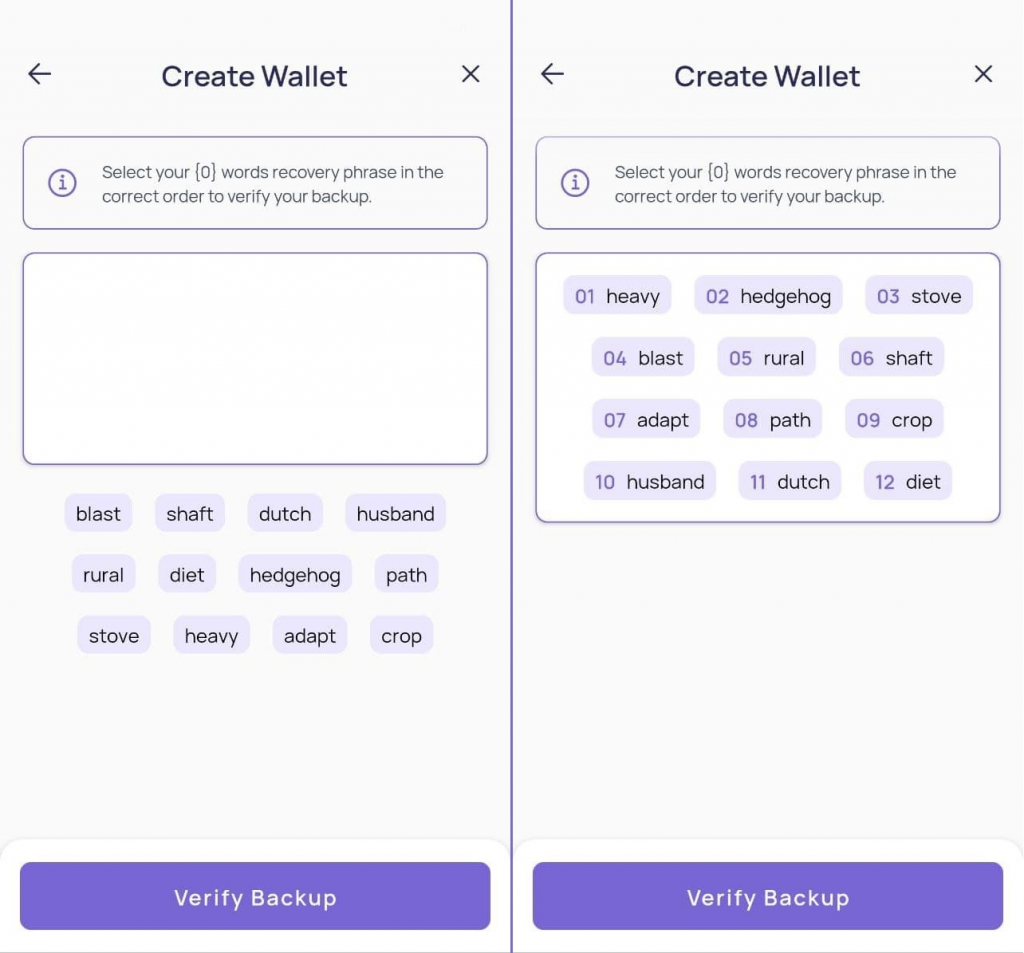
Once you have written down your backup phrase on paper, click on the “Verify Backup” option, which will require you to enter all of the words in the exact order you wrote them down.

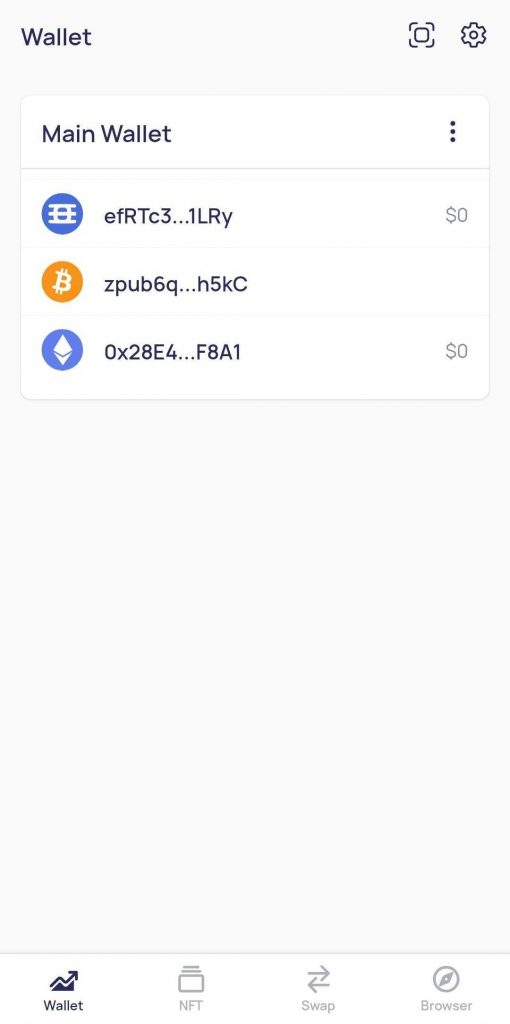
After entering all the words from your 12-word Recovery Phrase, click on the “Verify Backup” button to confirm your backup and return to your Main Wallet screen.

How to create a Hive wallet and Splinterlands account

To safeguard your account from potential compromise, it is essential to store your keys in a secure location. We highly recommend using Hive Keychain for the safest and most secure interaction with Splinterlands. Follow the steps below to find and install the version of Hive Keychain that is compatible with your device:

Please note that a mobile version of Hive Keychain is also available.

The installation process of Hive Keychain may vary slightly from device to device and comprises steps 1-5. After installation, follow steps A-K for the setup and usage of the keychain. If you need to add a second account, refer to steps H & I. Finally, if you wish to change the keys stored in your keychain, follow the optional steps H, J, K, and L.

Hive Keychain Installation 

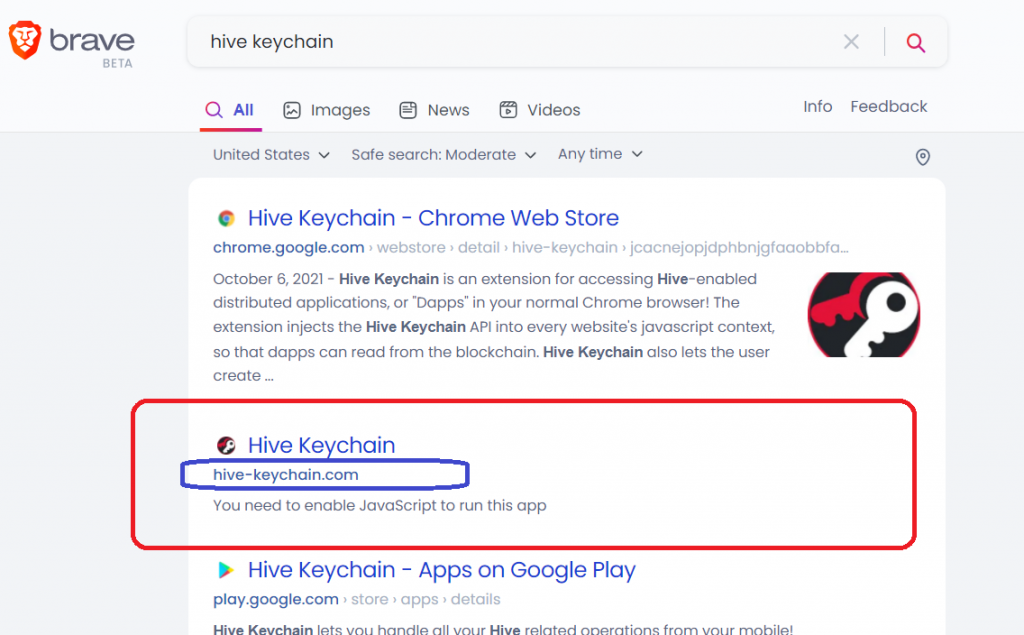
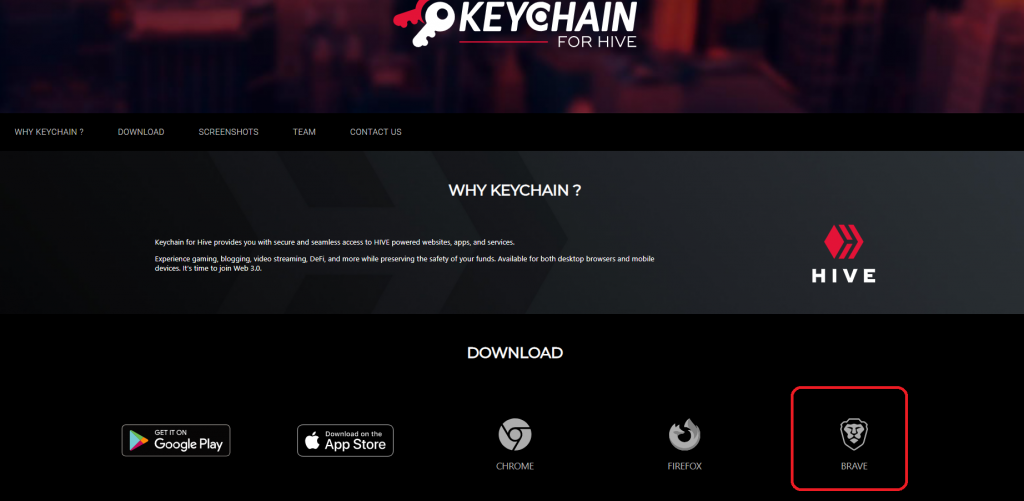
Step 1: Search for Hive Keychain using your preferred search engine, ensuring that the link you click on is hive-keychain.com.

Step 2: Navigate to hive-keychain.com and scroll down until you locate the appropriate browser/device version.

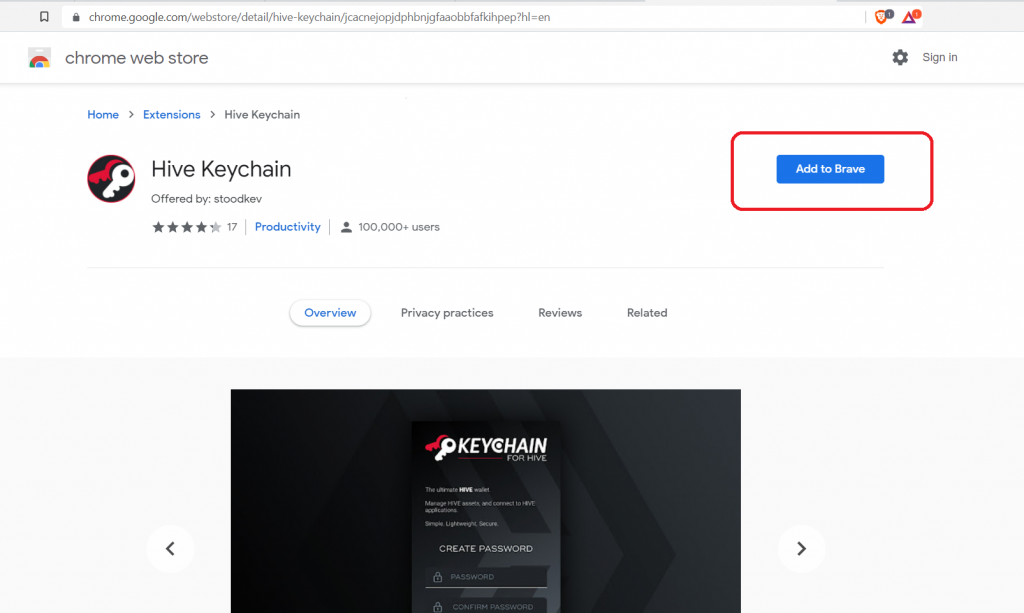
Step 3: Choose the suitable link and download the setup file. In this example, we are utilizing Brave. The appearance may differ for your browser version. Press “Add to Brave”.

Step 4: To grant permission for the Keychain to interact with websites and sign transactions without the need to enter HIVE keys repeatedly, simply click on the “Add Extension to Brave” button.

Step 5: To proceed, click on the red circled Puzzle Piece icon, and then click on the purple Hive Keychain link.

Setup and Usage of Hive Keychain

To begin, create a unique password that you will use to access the keychain on this particular device. Once you’ve come up with a password, click on the submit button. It’s worth noting that this password is specific to the device you’re currently using.

Step B: After setting up your device-specific password, you will see a prompt to proceed with the setup screen. Click on the first button, which says “use keys/pwd”.

Step C: As part of the setup process, you’ll need to provide the master password that was given to you by Splinterlands. You can find it highlighted in purple on the screen.

To proceed, enter your username and master password in the dialog box provided. While you can load your keys individually, it’s recommended to load your master password for the most efficient process. Once you’ve entered your information, click on the “Import Keys” button to proceed.

Step D: You’ll need to select the specific keys you wish to import and then click on the “Save” button.

Step E: Once you’ve saved your selections, your wallet should resemble the image displayed above.

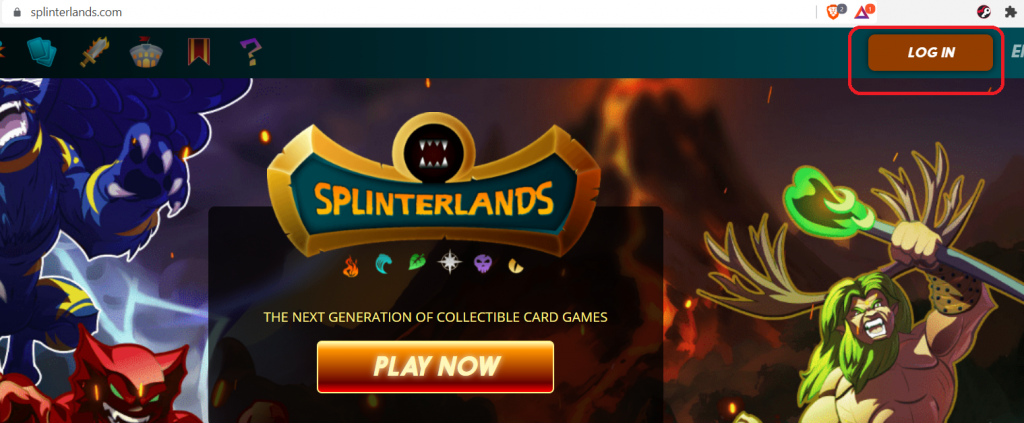
Step F: You should test your keys to ensure that they are working properly. Navigate to Splinterlands.com and click on the “Login” button to proceed.

Step F1: To continue, enter your username and then click on the “Login with KEYCHAIN” button.

Step F2: As you attempt to sign in, a pop-up will appear to notify you that you’re about to sign a transaction from your account using the posting key. This pop-up will appear every time an application requests permission to sign a transaction on your behalf. You can click the button that’s circled in red to prevent this pop-up from showing up again.

Step F3: After clicking on the “Confirm” button, the website will show that you’re logged in. This confirms that your keys are working correctly. Now, it’s time to move on to the most critical step in this process.

Step G: It’s crucial to take any remaining copies of your keys and store them in cold storage. This step is important for the security of your Hive account, as it reduces the risk of unauthorized access and potential theft.

If you want to add a second account to your keychain, follow Steps H and I below.

If you need to change the keys stored in your keychain, follow Steps H, J, K, and L.

Step H: To add a second account to your keychain, click on the three lines located above the interface. This will bring up the keychain’s menu options. Proceed to Step I after this.

Step I: Once you’ve accessed the keychain’s menu options, click on “Add Account” to proceed. You can then follow Steps B-E to add the new account to your keychain.

Step J: In the “MANAGE ACCOUNTS” screen, you can access several options by clicking on the corresponding circles. The blue circle will display the private key stored in your Hive Keychain, while the green circle will show you the public key for your wallet. If you click on the red circle, the key will be removed from your wallet.

Step K: Once you click the red circle to remove the key from Step I, your screen will update to show the remaining keys in your keychain. To add a new key, click on the plus button located next to the existing keys. This will take you to the next screen.

Step L: You can add a new key to your keychain by following the prompts and clicking “Import Key”. After completing this step, it’s important to go back to…

Step G: Store any additional copies of your keys in cold storage for maximum security.

How to create a Phantom Wallet

Browser extension: 

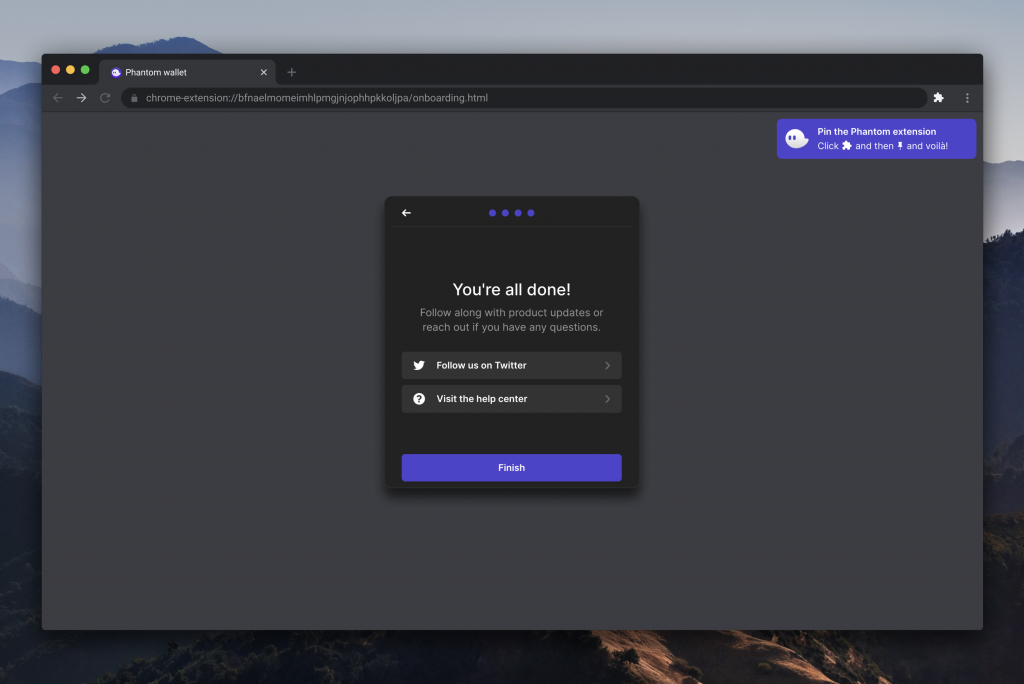
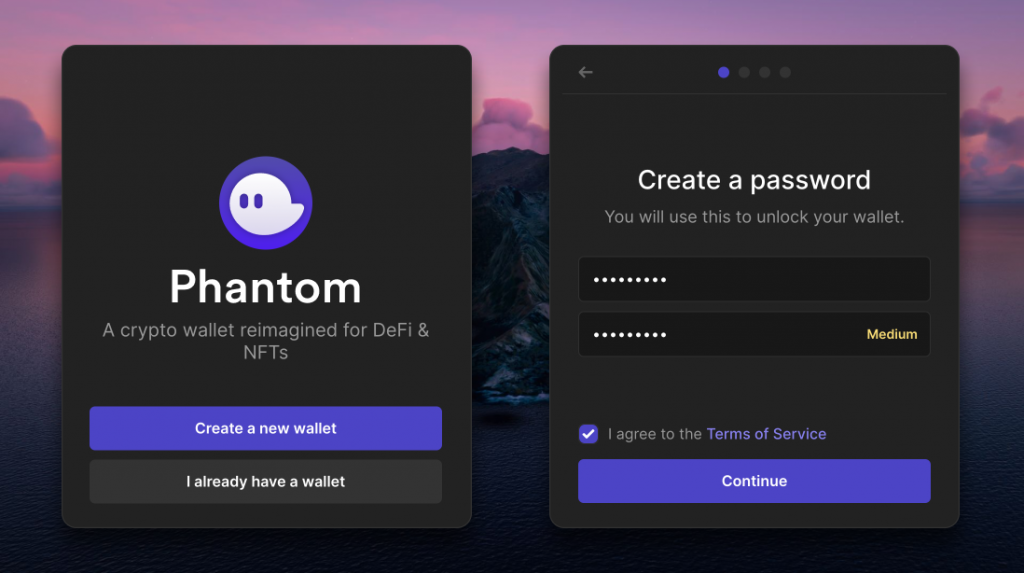
To add Phantom to your browser, go to https://phantom.app/download and choose your browser type. Then follow the instructions to install the extension from your browser’s store. Once installed, Phantom will open in a new tab.

If you are a new user, select “Create New Wallet” and create a password. If you already have a wallet, choose “I already have a wallet” and enter your seed phrase to restore it. After entering the password, click on “Continue” to access the main interface of Phantom. This will allow you to manage your crypto assets and perform various actions, such as sending and receiving coins or connecting to decentralized apps (dapps).

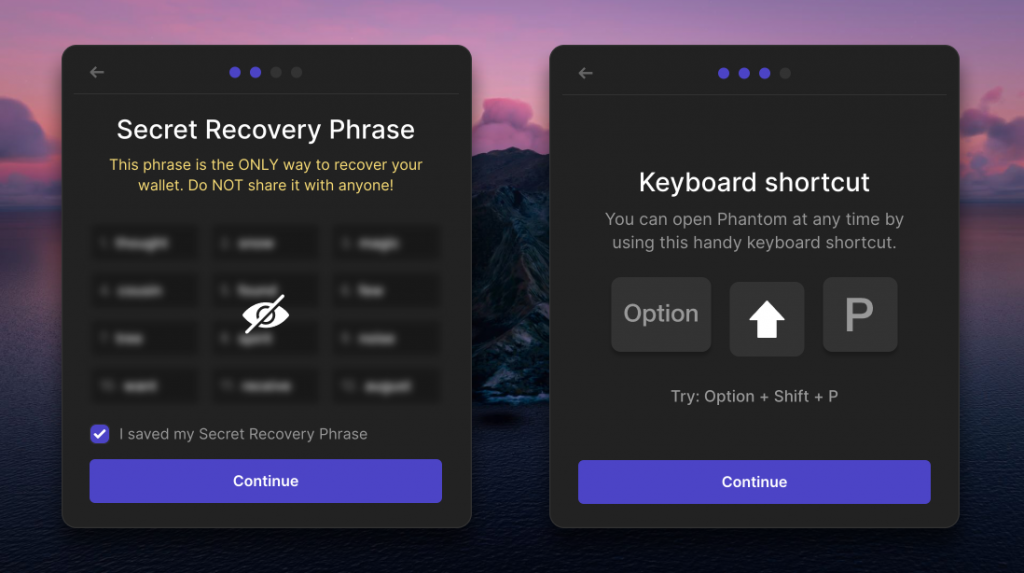
It is extremely important to store your “Secret Recovery Phrase” in a secure and safe place, as it is the only way to recover your wallet. No one from the Phantom team will ever request this phrase from you. Keep in mind that whoever has access to this phrase has control over your funds.

We now have an integration with 1Password, a secure password manager, to store your secret recovery phrase. After securely storing your seed phrase, click “Continue” to proceed.

In the next step of onboarding, you will discover the keyboard shortcuts that allow you to quickly access the Phantom app. Click “Continue” to proceed.

Finally, you should be in the last step of the setup process. To find the Phantom icon in your browser, look for it in your browser’s toolbar. In Chrome, it will be located on the top right-hand side of the screen. If you don’t see it, look for a “puzzle piece” icon, which represents your installed extensions. There you should find Phantom, and you can click the “pin icon” to easily locate it in the future.

Mobile app:

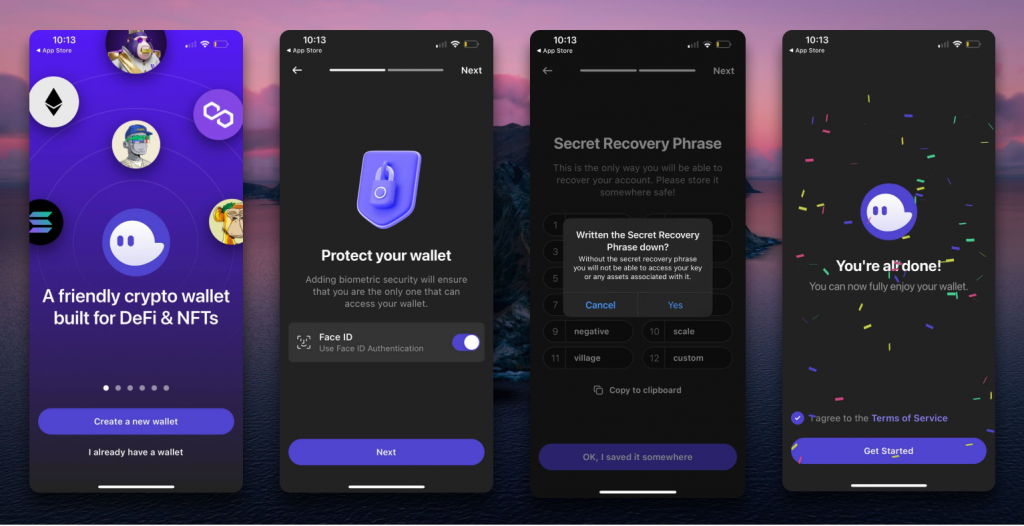
To install the Phantom app on your device, go to https://phantom.app/download and select the appropriate app marketplace based on whether you have an iOS or Android device. You will be redirected to the Phantom app on your device’s app store, where you can follow the steps to download and install it. Once installed, open the app to access the onboarding screen.

If you are a new user, choose “Create a new wallet” and set up device authentication (this may vary depending on your device type) to secure your wallet from unauthorized access. If you already have a wallet, select “I already have a wallet” and enter your seed phrase to restore it.

It is of utmost importance to store your “Secret Recovery Phrase” in a secure place, as it is the only means of recovering your wallet. The Phantom team does not have access to this phrase and will never ask for it. Remember, whoever has access to your seed phrase has complete control over your wallet.

As an optional step, you can turn on notifications to receive real-time updates about your wallet activity. These can be customized in the “Settings – Notifications” section.

Under no circumstances should you share your “Secret Recovery Phrase” with anyone. Doing so would grant them access to your wallet. No one should ever ask for your secret phrase or private key, so do not reveal this information to anyone.

How to create a MetaMask wallet

To participate in the metaverse economy, one of the first steps is to set up a crypto wallet. A crypto wallet acts as a secure key to all of your web3 assets, including cryptocurrencies and NFTs. It enables you to securely access your assets and make transactions on the blockchain, as long as you safeguard the password and seed phrase associated with the wallet.

What Is MetaMask?

MetaMask is a widely used Ethereum-compatible wallet developed by ConsenSys. It can be accessed through a browser extension that is compatible with Chrome, Firefox, Brave, and Edge. Recently, ConsenSys announced a banking integration feature that allows eligible users to transfer funds directly from their bank account to their MetaMask wallet.

MetaMask is primarily used for transactions on the Ethereum network, but it is also fully compatible with other blockchain networks such as Avalanche, Polygon, Binance Smart Chain, Fantom, Harmony, and more. If you want to hold NFTs such as wearables for your avatar in Decentraland, for example, you will be able to access them via your MetaMask wallet, but you need to have your wallet connected to the app in order to use them.

Setting up MetaMask

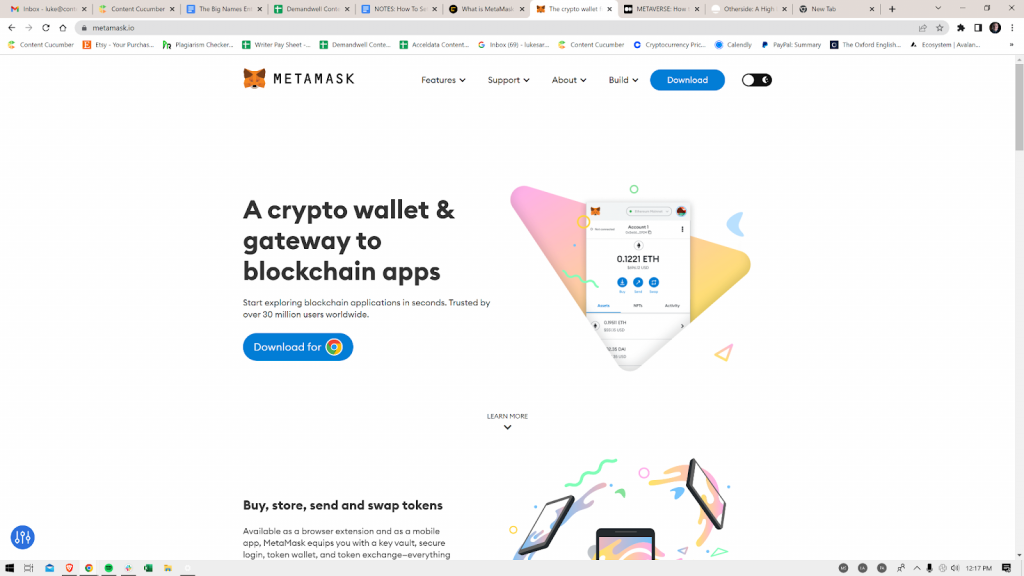
To start using MetaMask, go to the MetaMask website. Once there, you will see a blue button that enables you to download the extension for your preferred browser. For example, if you are using Chrome, you will see this Download button.
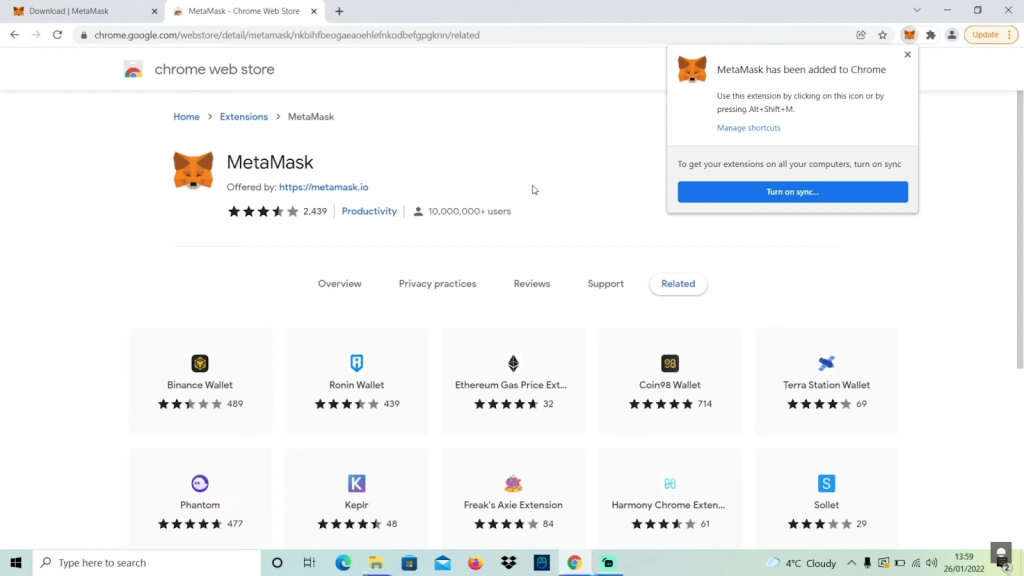
When you click on the blue button, you will be taken to the Chrome Web Store. Here, you can learn more about the application and read reviews from other users. Once you are ready to proceed, click on the “Add to Chrome” button to install the MetaMask wallet for free.

Once MetaMask is installed, you will see a fox icon in the top right corner of your screen and receive a notification confirming the installation. To easily access the extension, click on the puzzle icon to view your extensions, then click the pin icon next to MetaMask to keep it visible on the browser bar.

Setting Up Your MetaMask Wallet Recovery Phrase

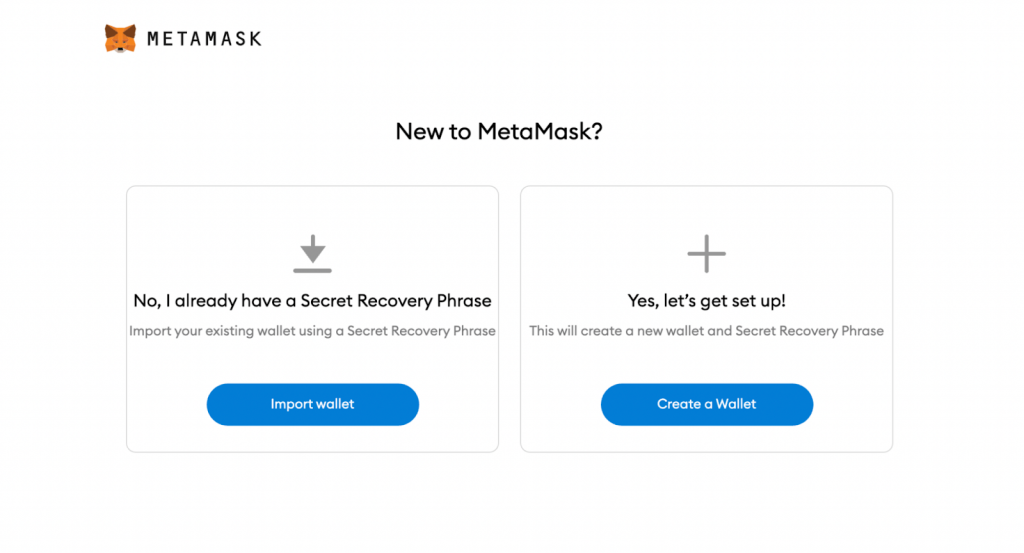
Next, you’ll be given the option to “Get Started.” Once you’ve clicked that button, you’ll see a screen like this:

If you are a new user, click the “Create a Wallet” button to set up a new wallet. You will then be asked if you want to share analytics with MetaMask, the choice is yours. Next, you will be prompted to create a password for your new wallet.

This password will be used to access your wallet on your device. It is important to choose a strong password for security. After creating a password, you will be presented with a set of 12 words that serve as your private key. These words are your backup and should be kept safe as they are the only way to restore your wallet.

MetaMask Safety

It’s crucial to understand the importance of these 12 words as your master key to all your digital assets. This passphrase is the only way to restore your wallet if you lose your password or device. Anyone with access to these 12 words can restore your wallet and gain access to your assets, including cryptocurrency and NFTs. Therefore, it’s extremely important to keep these words safe and offline, and not to share them with anyone. It’s a good practice to write them down and store them in a secure location.

MetaMask will ask you to confirm your secret recovery phrase by selecting the words in the order they were originally given to make sure you have written them down correctly. Once you have confirmed the 12 words, you can click “Continue” and your wallet setup is complete.

It is important to be aware of the potential risks and take necessary precautions to protect your assets from scams and hacks. Here is a good resource for learning about how to avoid getting scammed and having your assets stolen:

Exploring MetaMask

Once your wallet is set up, you can access it in two ways:

  1. By clicking on the fox icon in the upper right corner of your browser, this will open a small window with basic functionalities.
  2. By visiting the full-fledged MetaMask page, which will provide you with more detailed information and advanced options.

Both options will allow you to view your balance, transaction history, and other important information related to your wallet.

It’s important to note that you should always make sure that you are on the correct website, as there are phishing sites that may look similar to the real MetaMask site.

It’s important to remember that buying and selling cryptocurrencies and NFTs is a complex and dynamic process that requires research and understanding of the market. Before making any transactions, it’s crucial to do your own research and make an informed decision.

To transfer ETH or other tokens to your MetaMask wallet, you can use a cryptocurrency exchange such as Coinbase, Gemini, or Binance. These exchanges will allow you to purchase tokens using a credit card or bank transfer and then withdraw them to your MetaMask wallet.

When transferring tokens between wallets, it’s important to double-check the wallet address you are sending to, as crypto assets are not insured and a mistake can result in an irreversible loss of funds. A good practice is to test the transaction with a small amount of tokens first and check that it has arrived in your wallet before sending the full amount.

With your funds in your MetaMask wallet, you can start buying and selling NFTs on platforms like OpenSea or make purchases in metaverse platforms like Decentraland, The Sandbox, or Portals.

Keep in mind that this guide is meant to help you get started with creating your first crypto wallet, but it is not a comprehensive guide to buying, selling, and holding cryptocurrencies and NFTs. Always be sure to do your own research and stay informed about the market.