To safeguard your account from potential compromise, it is essential to store your keys in a secure location. We highly recommend using Hive Keychain for the safest and most secure interaction with Splinterlands. Follow the steps below to find and install the version of Hive Keychain that is compatible with your device:
Please note that a mobile version of Hive Keychain is also available.
The installation process of Hive Keychain may vary slightly from device to device and comprises steps 1-5. After installation, follow steps A-K for the setup and usage of the keychain. If you need to add a second account, refer to steps H & I. Finally, if you wish to change the keys stored in your keychain, follow the optional steps H, J, K, and L.
Hive Keychain Installation
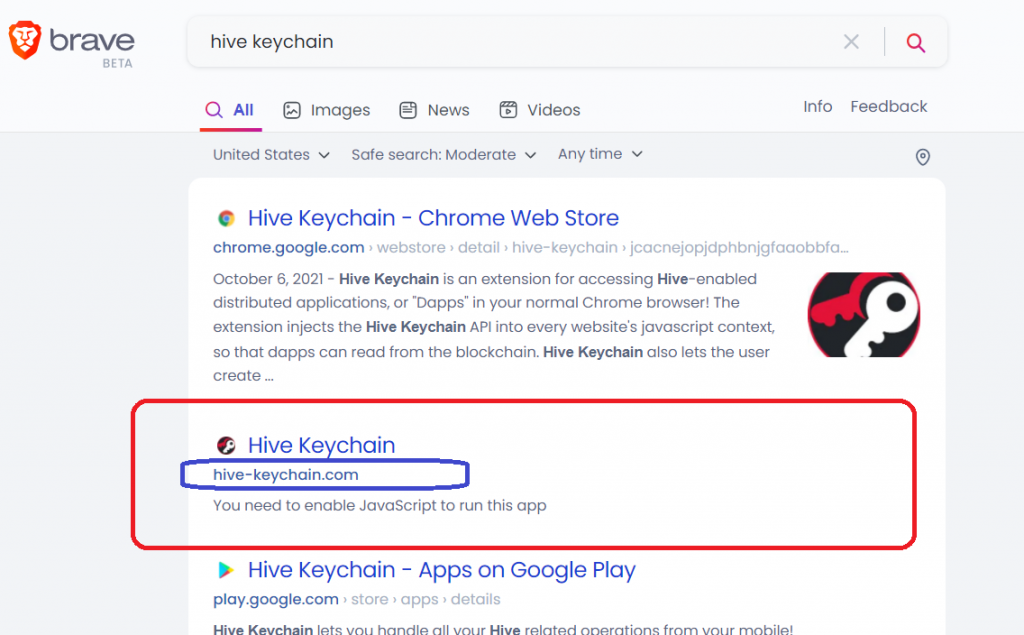
Step 1: Search for Hive Keychain using your preferred search engine, ensuring that the link you click on is hive-keychain.com.
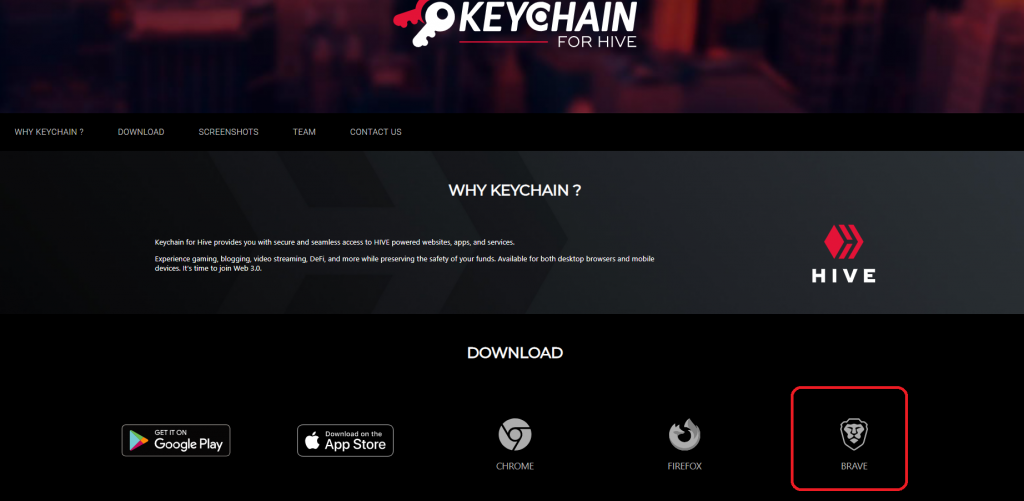
Step 2: Navigate to hive-keychain.com and scroll down until you locate the appropriate browser/device version.
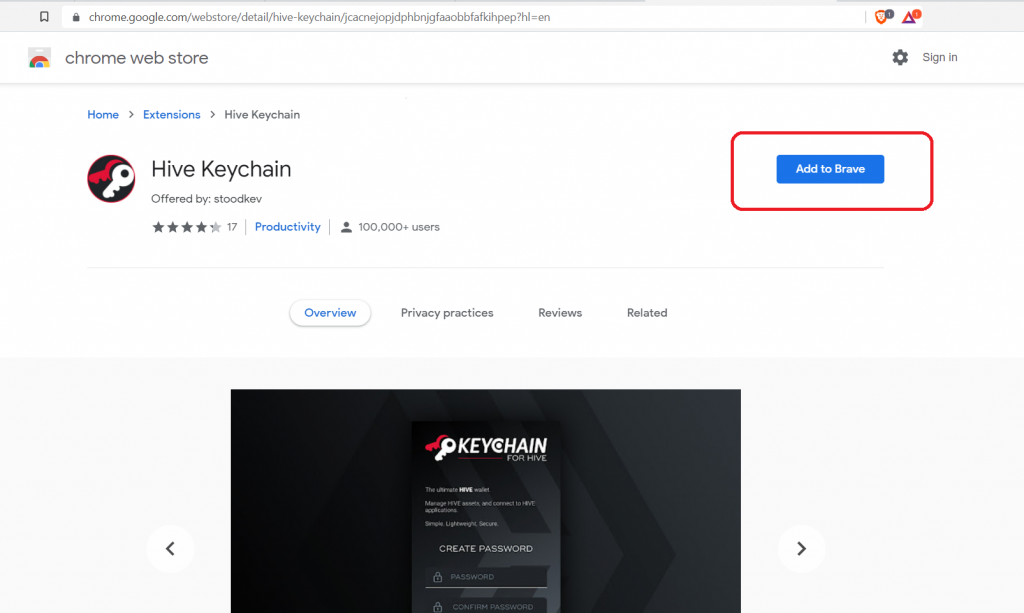
Step 3: Choose the suitable link and download the setup file. In this example, we are utilizing Brave. The appearance may differ for your browser version. Press “Add to Brave”.
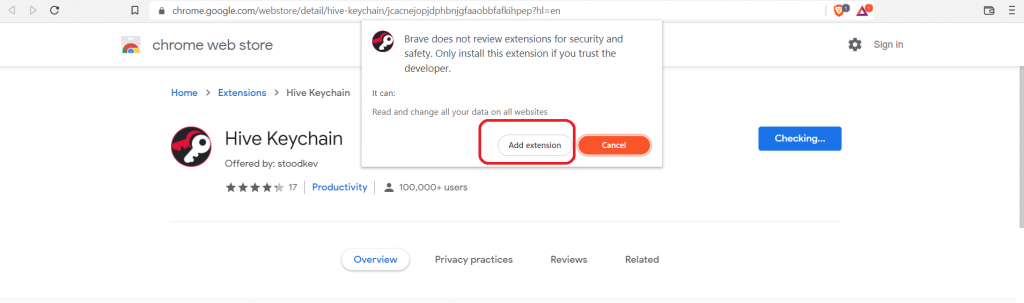
Step 4: To grant permission for the Keychain to interact with websites and sign transactions without the need to enter HIVE keys repeatedly, simply click on the “Add Extension to Brave” button.
- www.Splinterlands.com
- www.peakmonsters.com
- www.monstermarket.io
- www.cardauctionz.com
- baronstoolbox.com
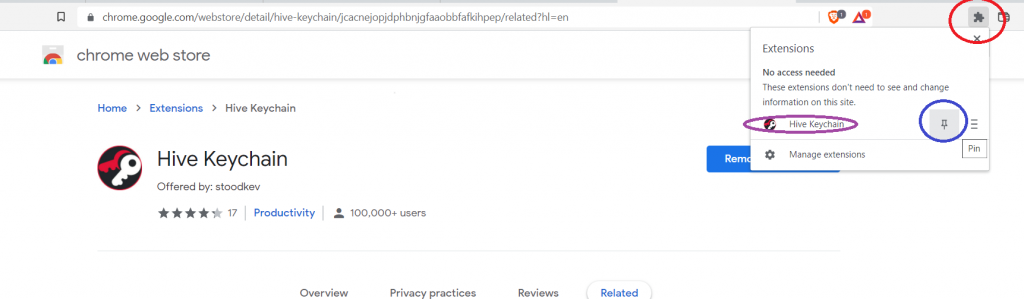
Step 5: To proceed, click on the red circled Puzzle Piece icon, and then click on the purple Hive Keychain link.
Setup and Usage of Hive Keychain

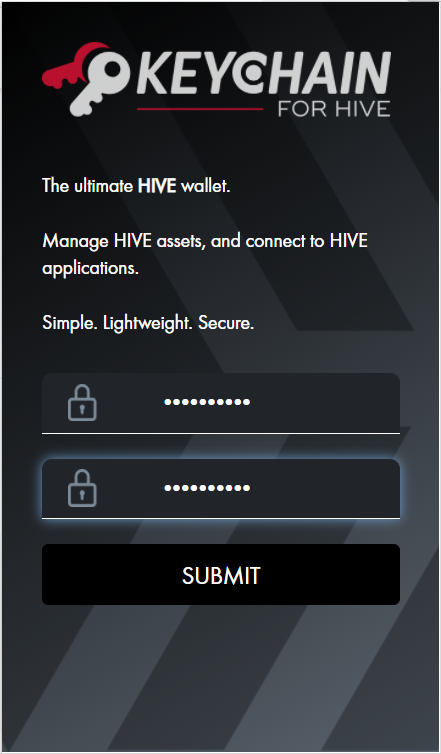
To begin, create a unique password that you will use to access the keychain on this particular device. Once you’ve come up with a password, click on the submit button. It’s worth noting that this password is specific to the device you’re currently using.
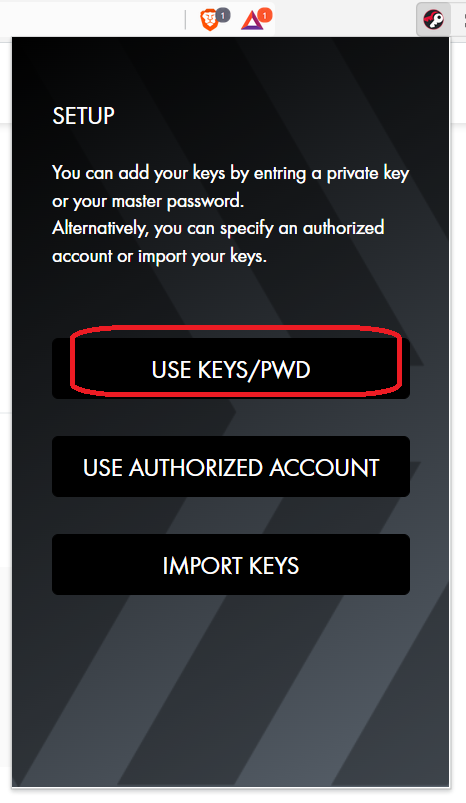
Step B: After setting up your device-specific password, you will see a prompt to proceed with the setup screen. Click on the first button, which says “use keys/pwd”.
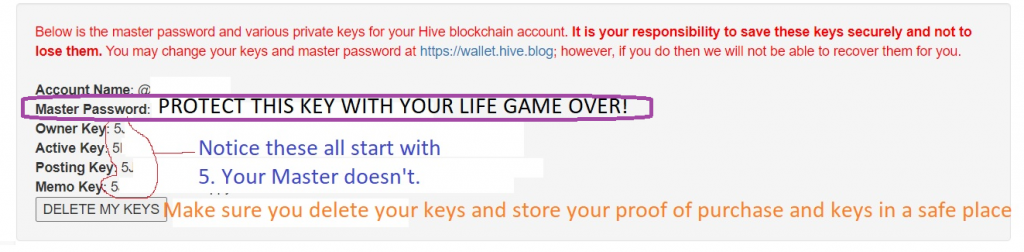
Step C: As part of the setup process, you’ll need to provide the master password that was given to you by Splinterlands. You can find it highlighted in purple on the screen.
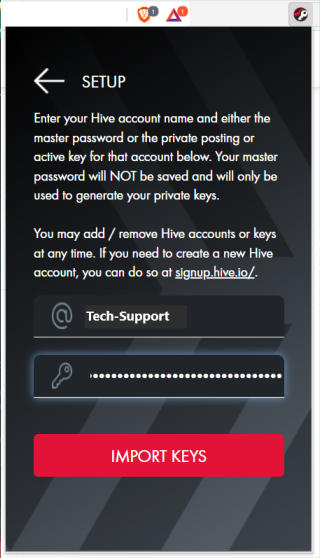
To proceed, enter your username and master password in the dialog box provided. While you can load your keys individually, it’s recommended to load your master password for the most efficient process. Once you’ve entered your information, click on the “Import Keys” button to proceed.
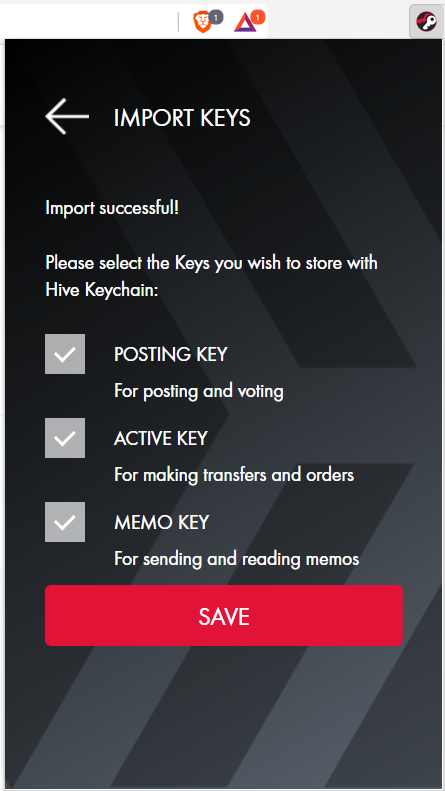
Step D: You’ll need to select the specific keys you wish to import and then click on the “Save” button.
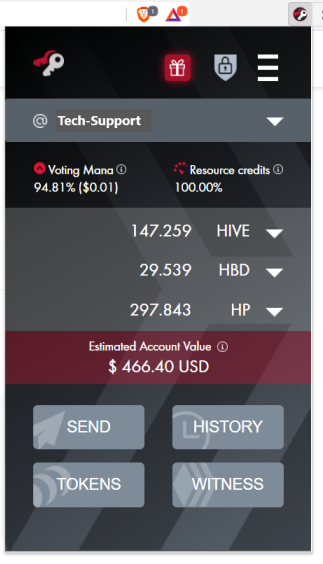
Step E: Once you’ve saved your selections, your wallet should resemble the image displayed above.
Step F: You should test your keys to ensure that they are working properly. Navigate to Splinterlands.com and click on the “Login” button to proceed.
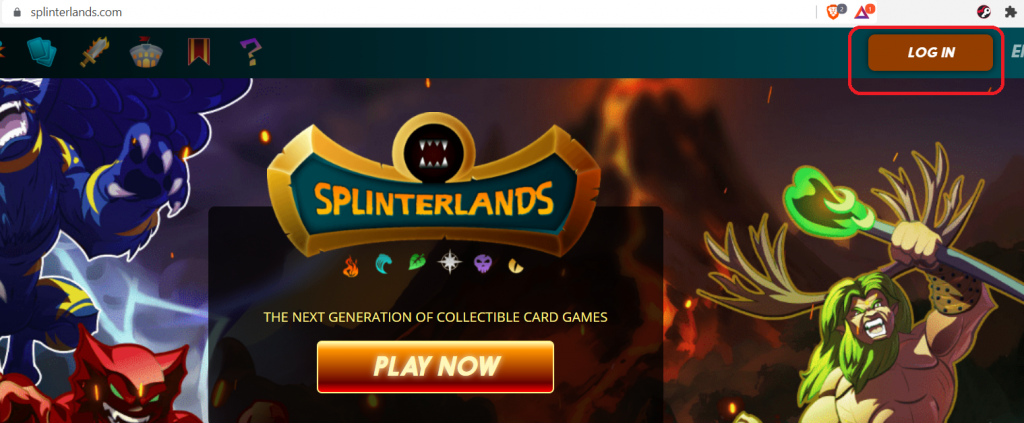
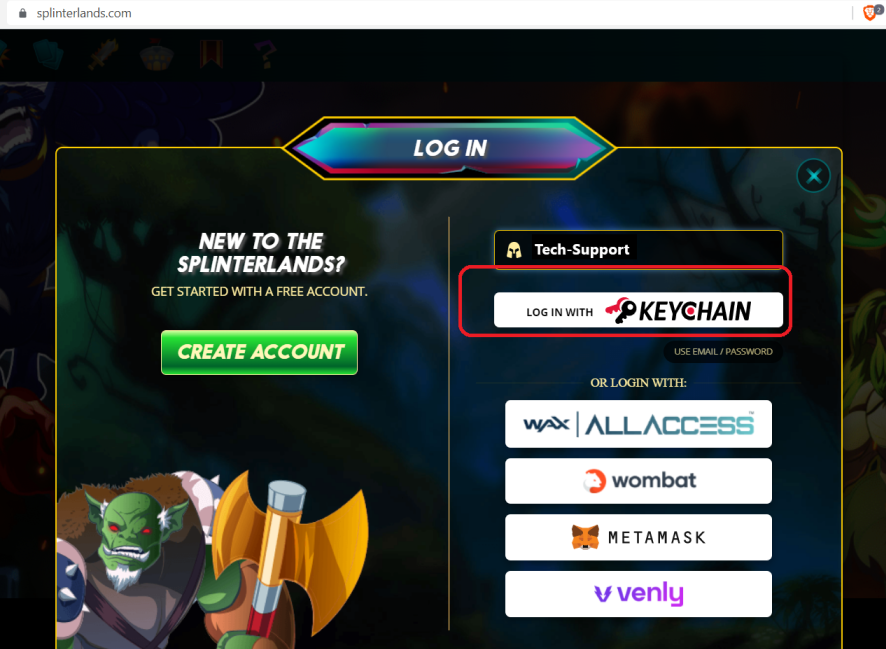
Step F1: To continue, enter your username and then click on the “Login with KEYCHAIN” button.
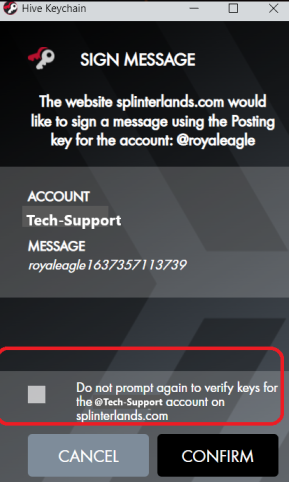
Step F2: As you attempt to sign in, a pop-up will appear to notify you that you’re about to sign a transaction from your account using the posting key. This pop-up will appear every time an application requests permission to sign a transaction on your behalf. You can click the button that’s circled in red to prevent this pop-up from showing up again.
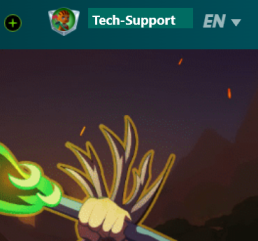
Step F3: After clicking on the “Confirm” button, the website will show that you’re logged in. This confirms that your keys are working correctly. Now, it’s time to move on to the most critical step in this process.
Step G: It’s crucial to take any remaining copies of your keys and store them in cold storage. This step is important for the security of your Hive account, as it reduces the risk of unauthorized access and potential theft.
If you want to add a second account to your keychain, follow Steps H and I below.
If you need to change the keys stored in your keychain, follow Steps H, J, K, and L.
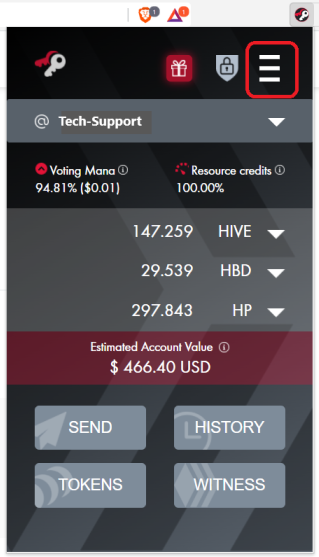
Step H: To add a second account to your keychain, click on the three lines located above the interface. This will bring up the keychain’s menu options. Proceed to Step I after this.
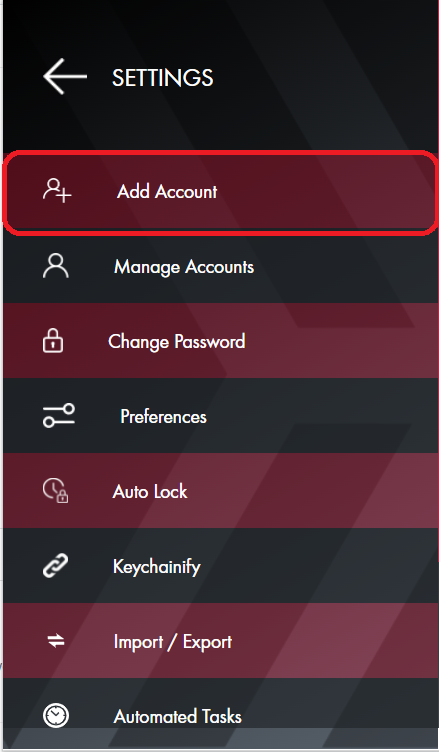
Step I: Once you’ve accessed the keychain’s menu options, click on “Add Account” to proceed. You can then follow Steps B-E to add the new account to your keychain.
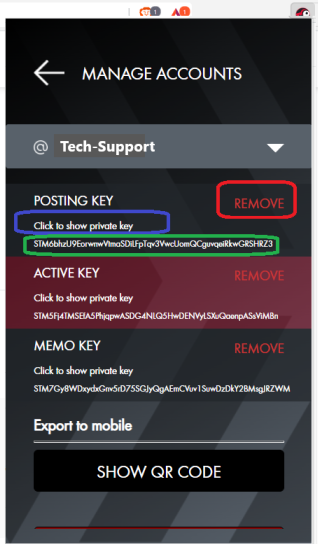
Step J: In the “MANAGE ACCOUNTS” screen, you can access several options by clicking on the corresponding circles. The blue circle will display the private key stored in your Hive Keychain, while the green circle will show you the public key for your wallet. If you click on the red circle, the key will be removed from your wallet.
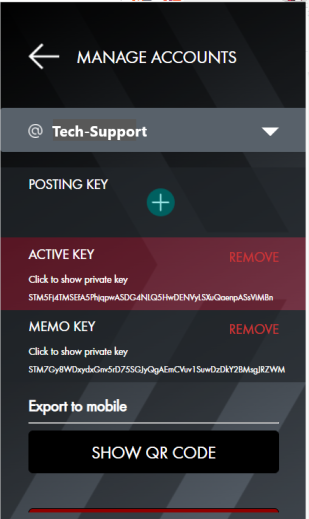
Step K: Once you click the red circle to remove the key from Step I, your screen will update to show the remaining keys in your keychain. To add a new key, click on the plus button located next to the existing keys. This will take you to the next screen.
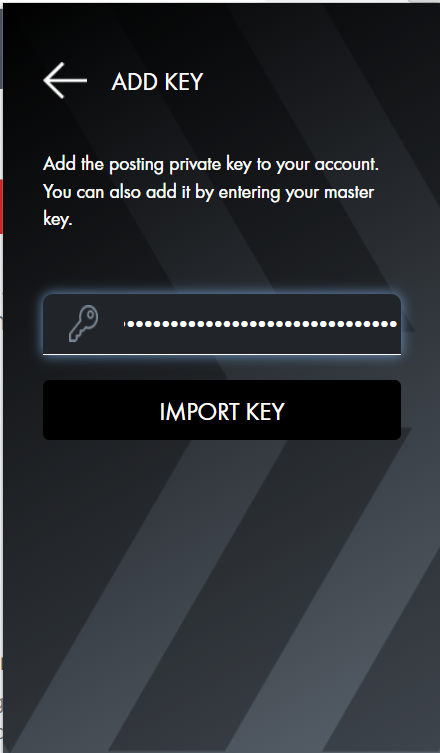
Step L: You can add a new key to your keychain by following the prompts and clicking “Import Key”. After completing this step, it’s important to go back to…
Step G: Store any additional copies of your keys in cold storage for maximum security.